Navigation Walkthrough
Navigation Walkthrough
Welcome to the Navigation Walkthrough for Fleetongo.
Go to app.fleetongo.com
1. Introduction
This guide will assist you in efficiently navigating through the application. Follow the precise instructions below to explore the features seamlessly.

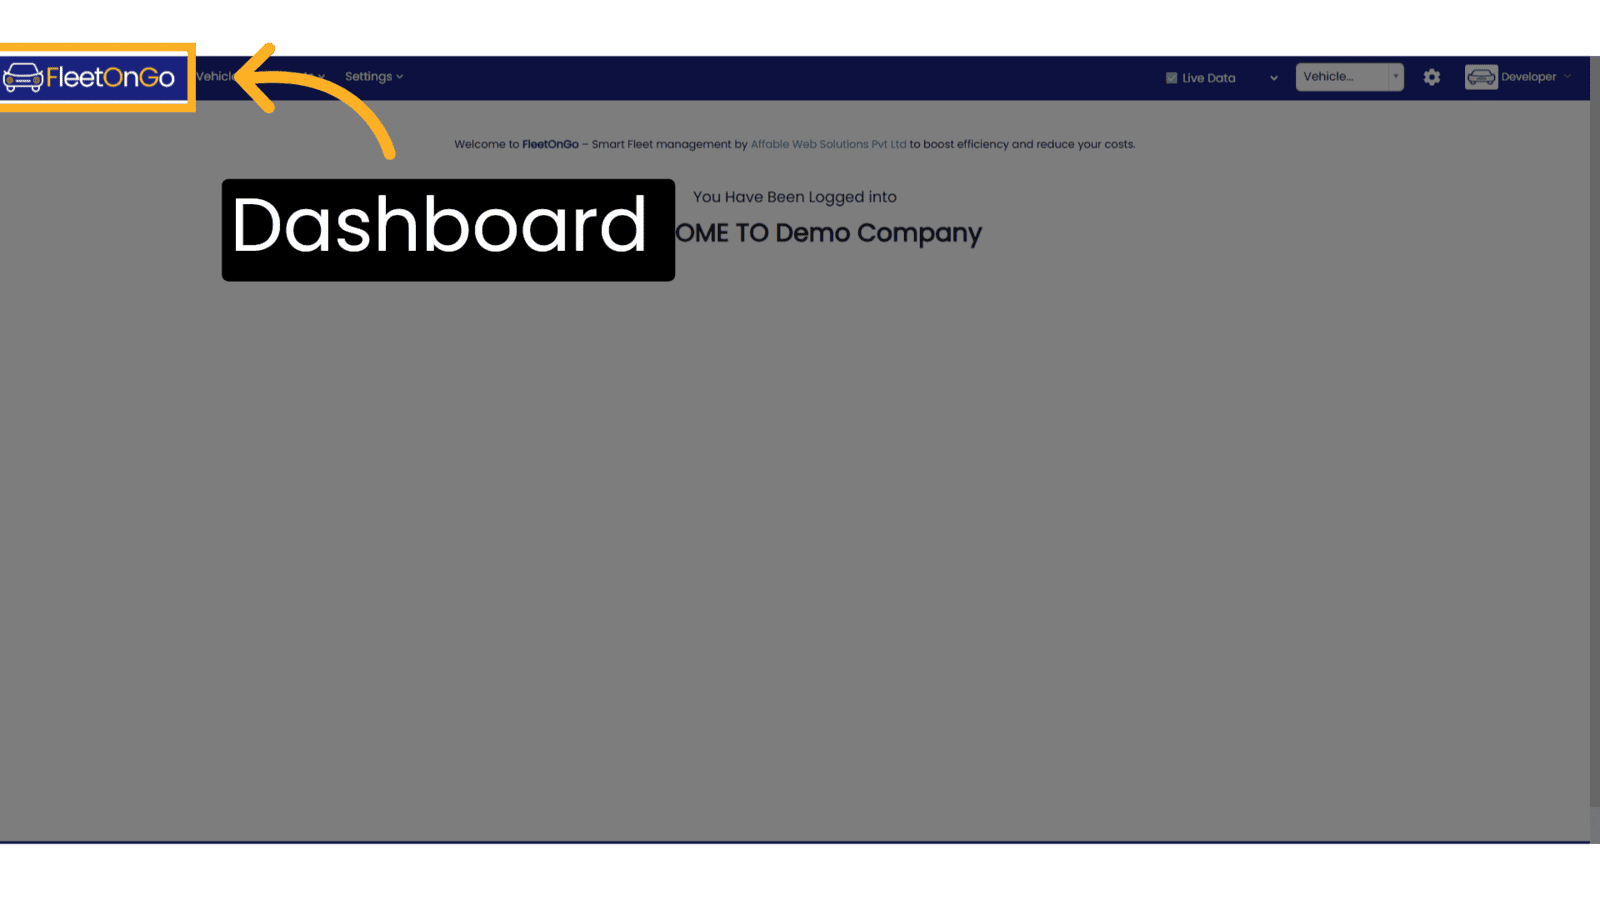
2. Dashboard
On the Header Section, Click on the FleetOnGo Logo to visit Main Dashboard
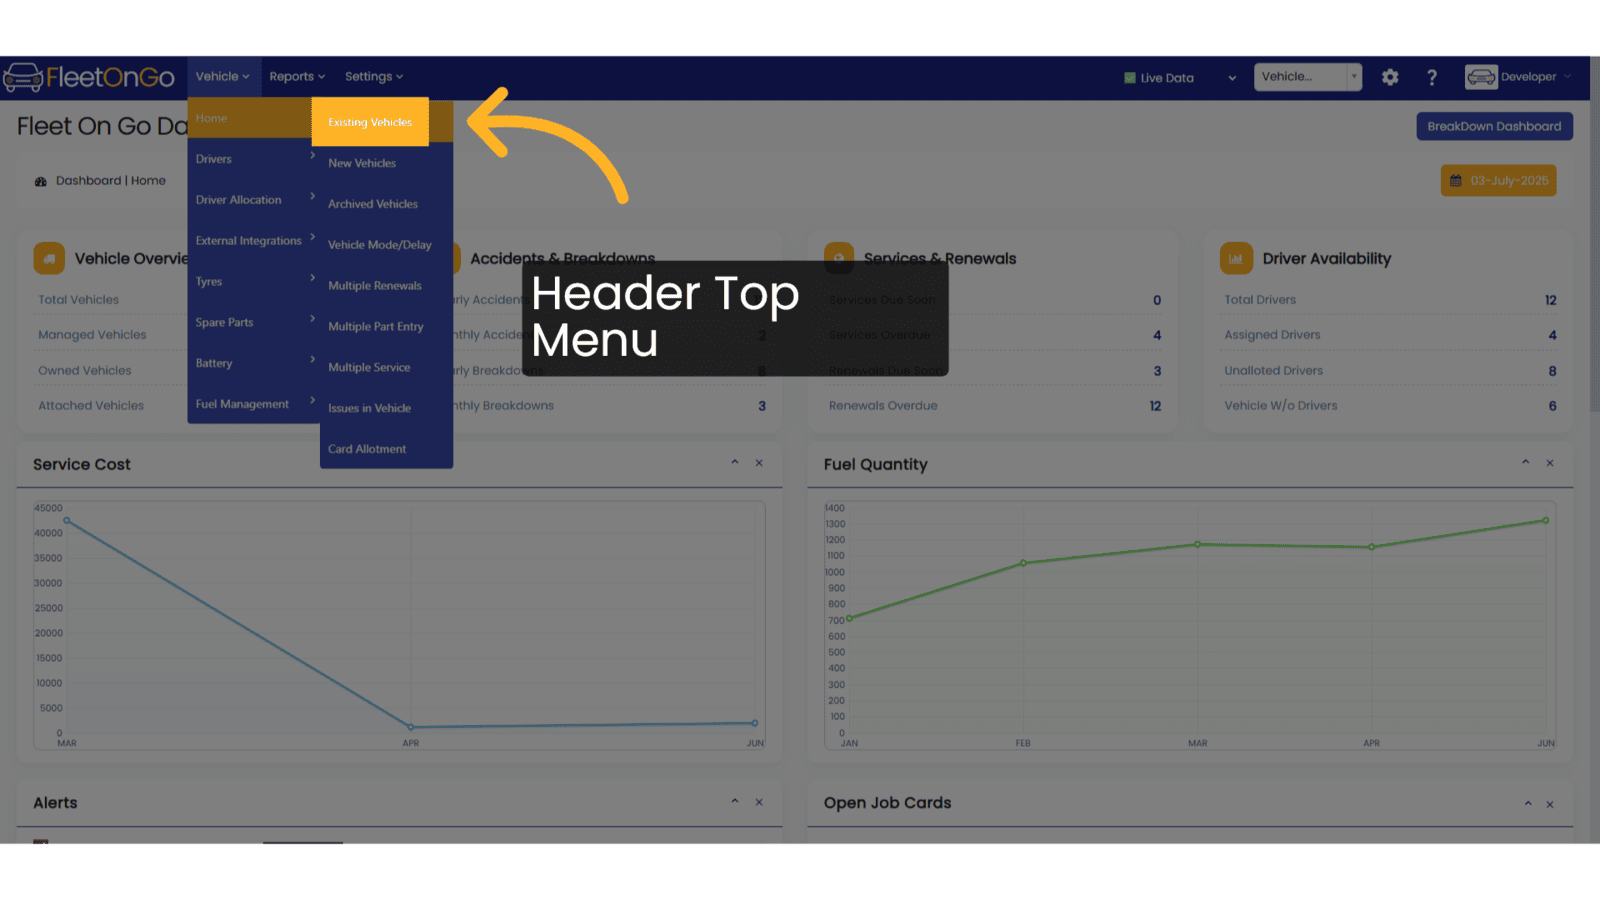
3. Header Top Menu
Access the Top Menu to find relevant options in FleetOnGo, this Section is Divided into 3 Sections, Vehicles, Reports and Settings.
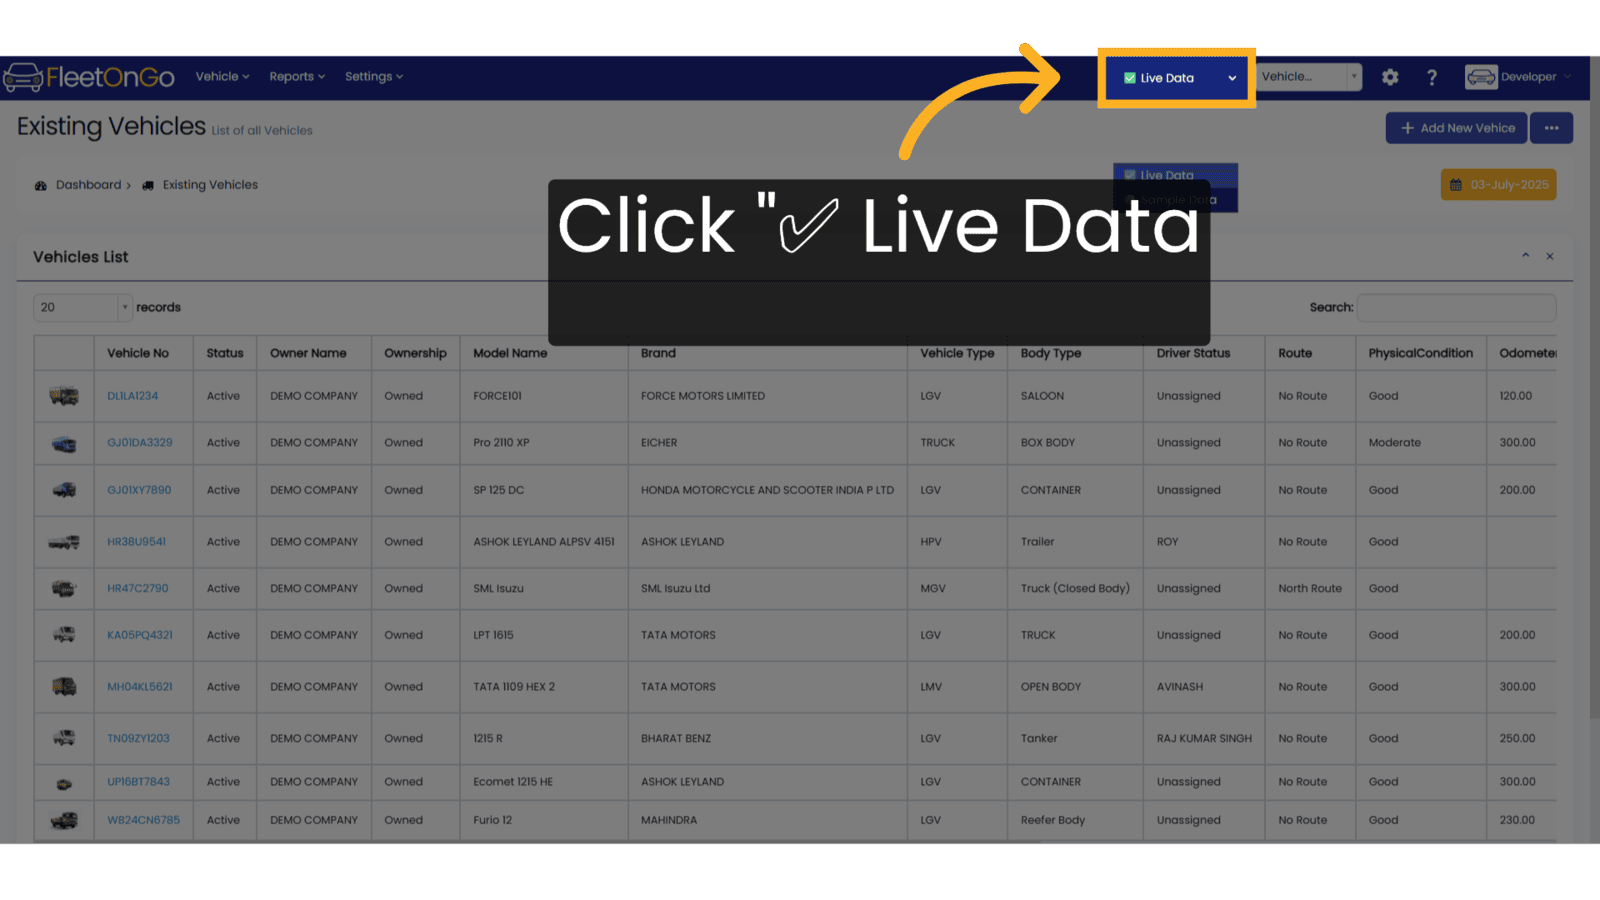
4. Switch to Live <> Sample Data Mode
Live Data Option is visible on the Dashboard to switch between Sample Data Mode and Live Data Mode. This Sample Data will help you understand how your portal will look when you have entered some of your data.
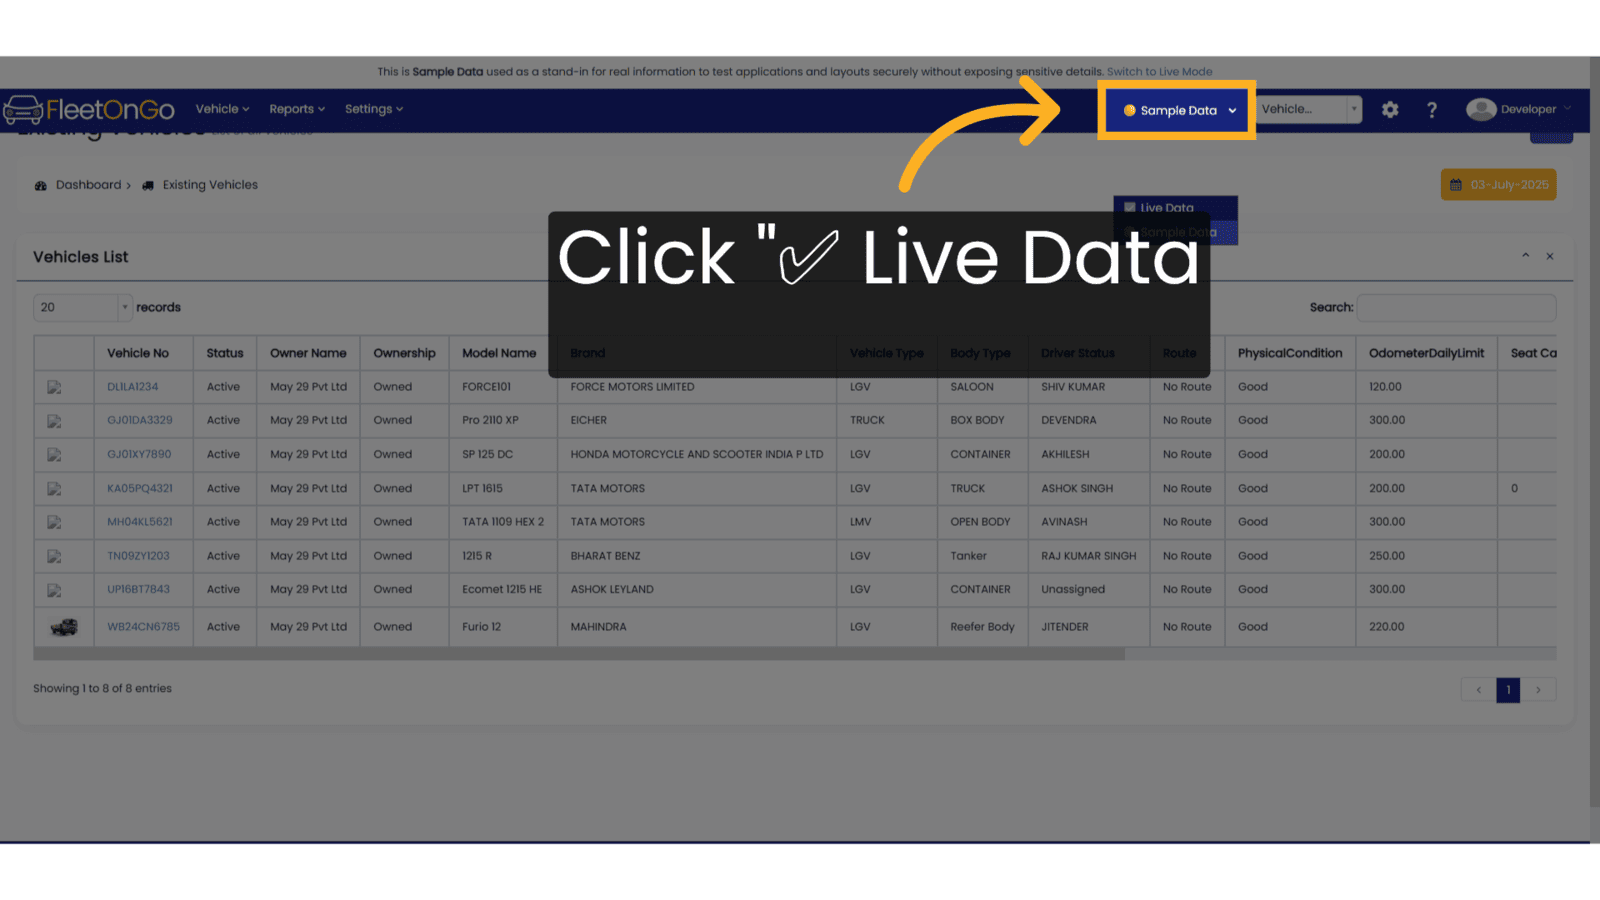
5. Click to Come back to Live Data
Click again to Come back to Live Data.
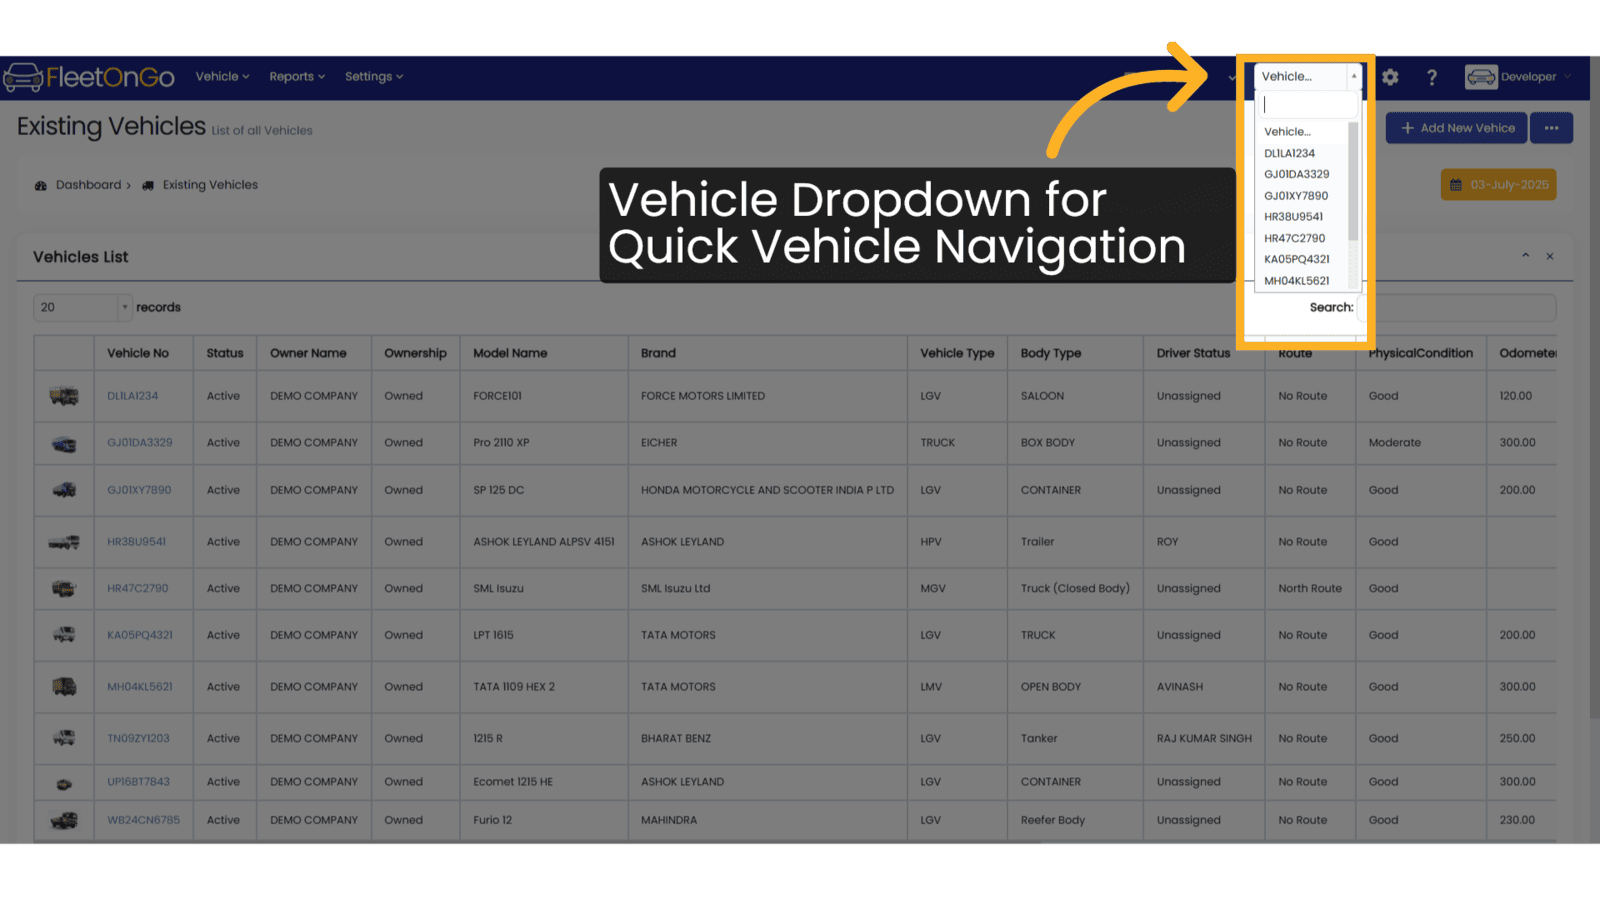
6. Vehicle DropDown
Vehicle Drop Down Section is given on top header section to quickly navigate inside the vehicle specific dashboard.
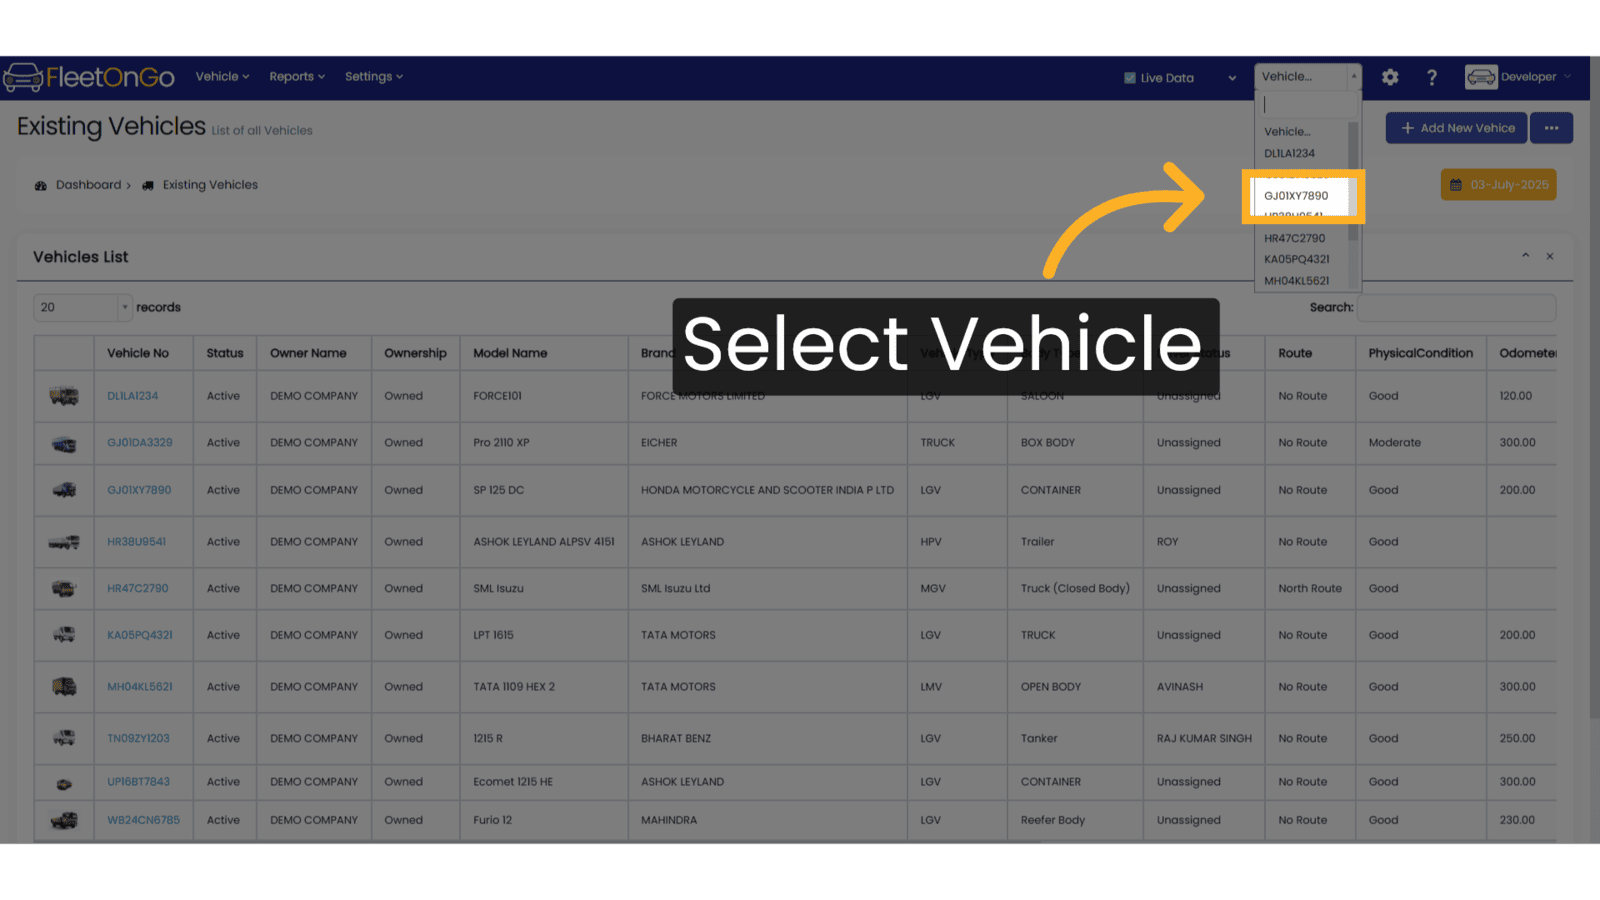
7. Select Vehicle from DropDown
Select the vehicle whose detail you want to navigate.
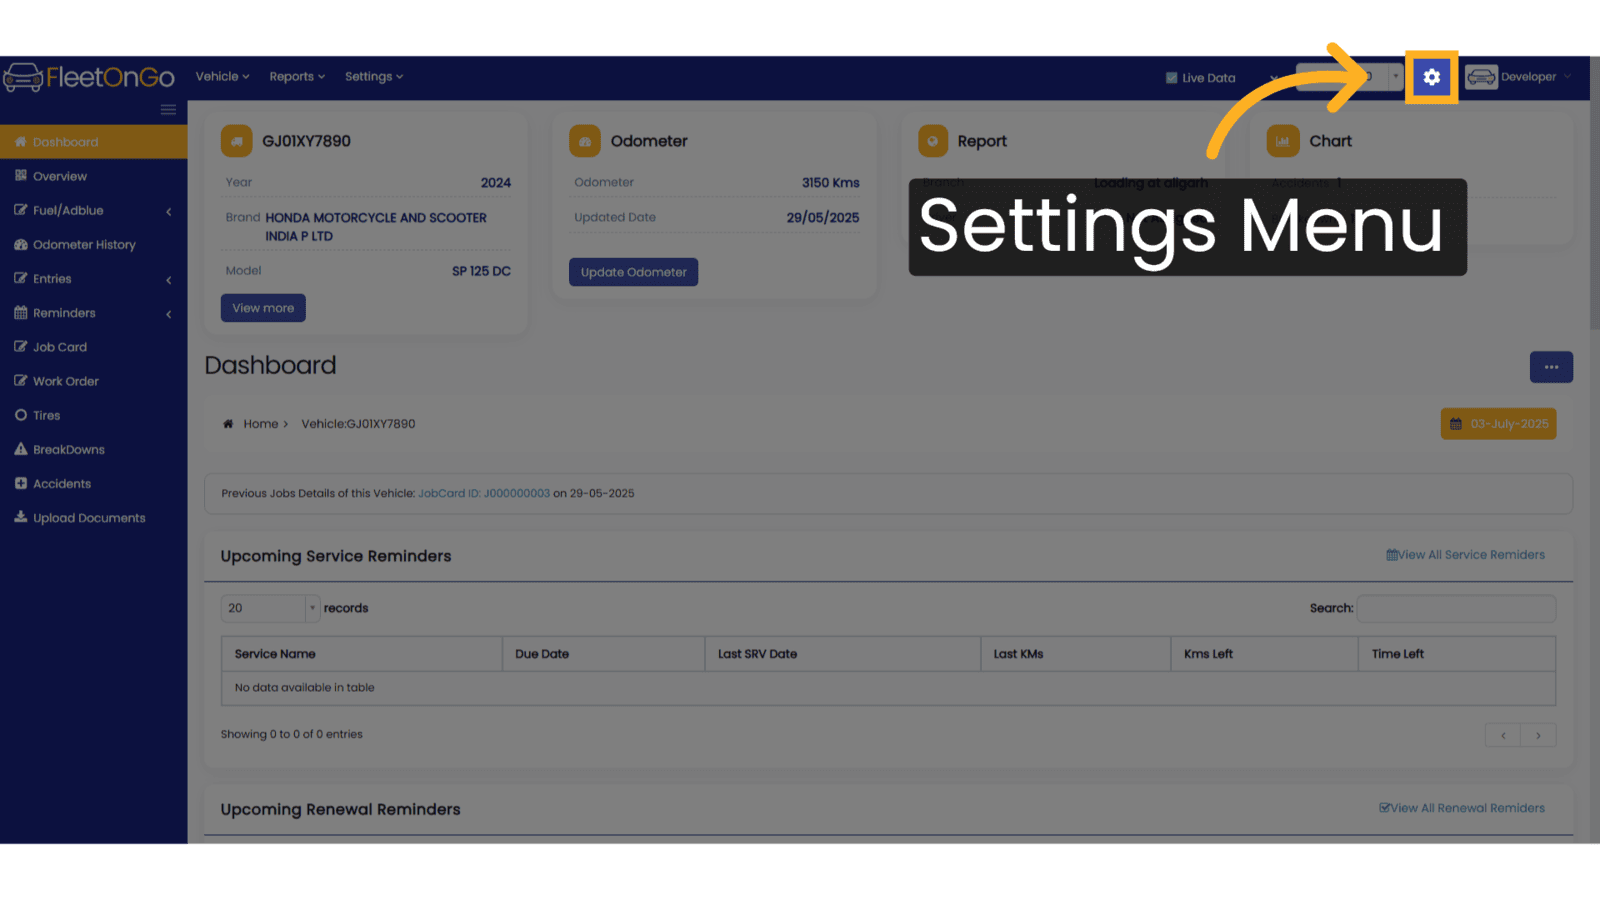
8. Settings
Click on the COG icon to Access the settings menu.
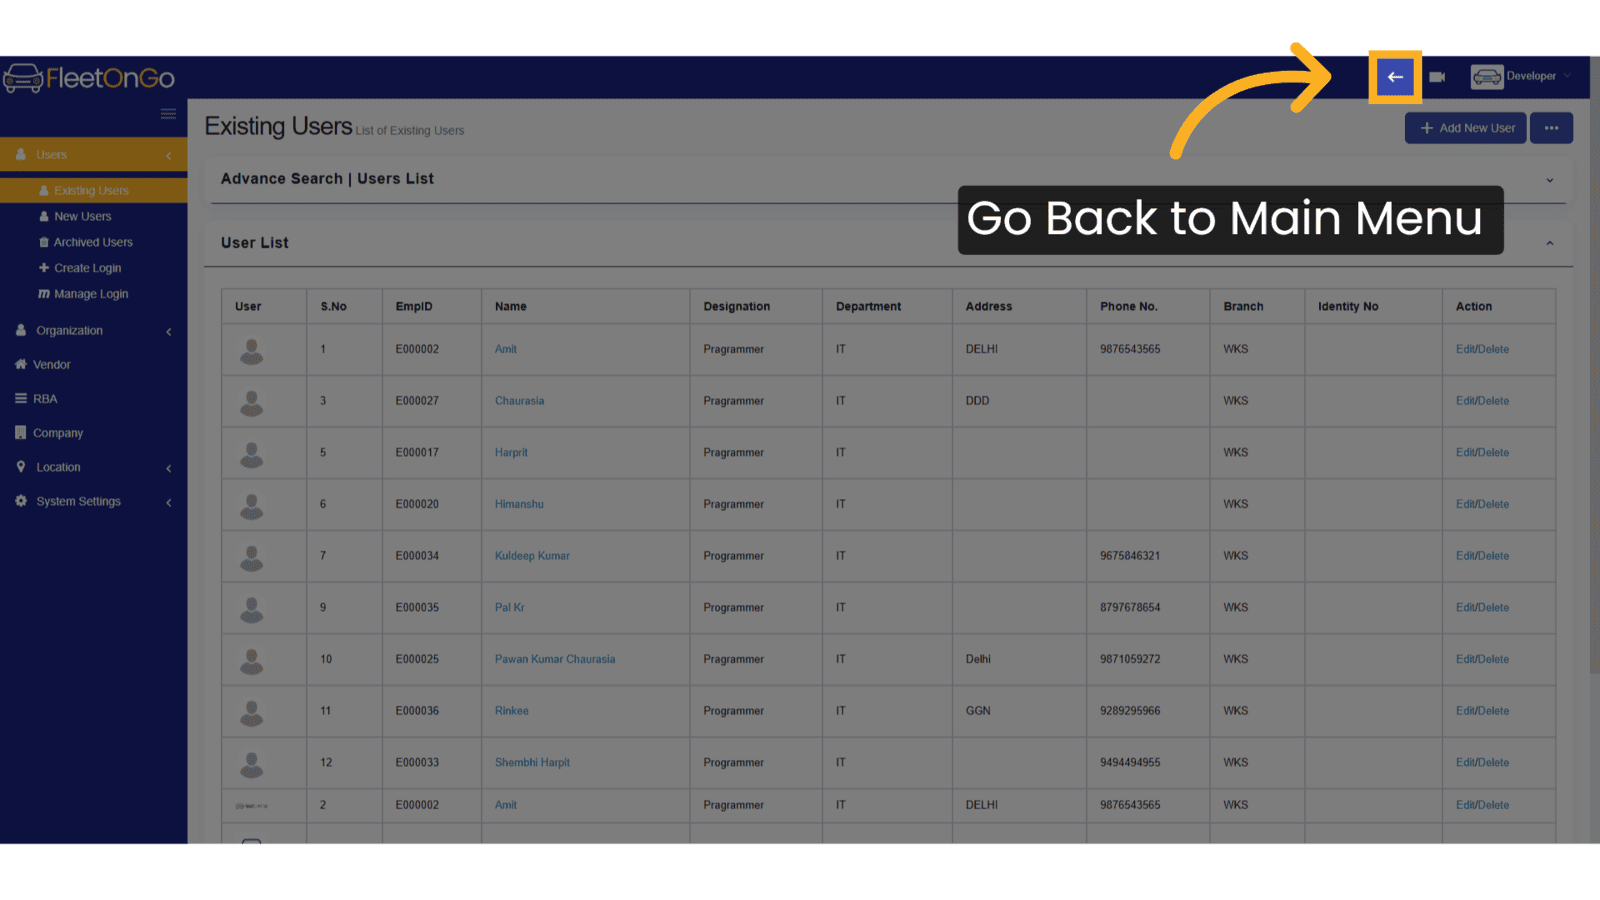
9. Back to Main Menu
Click the back arrow button to go back to main menu.
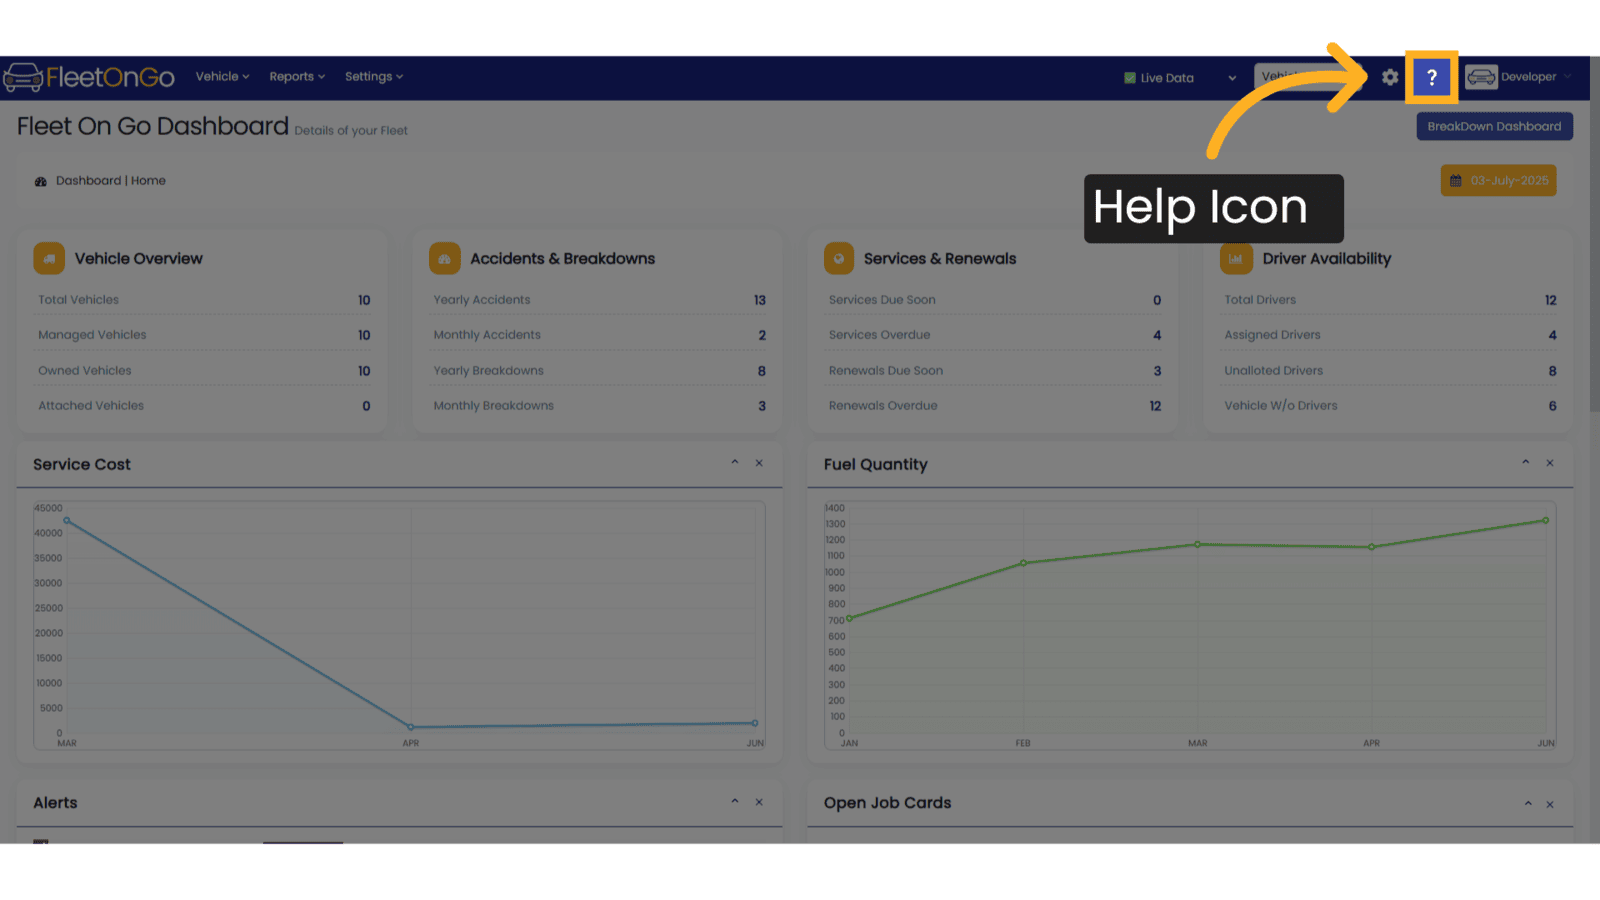
10. Help Section
Click on Question mark icon to see the Help Options like help video or knowledgebase link.
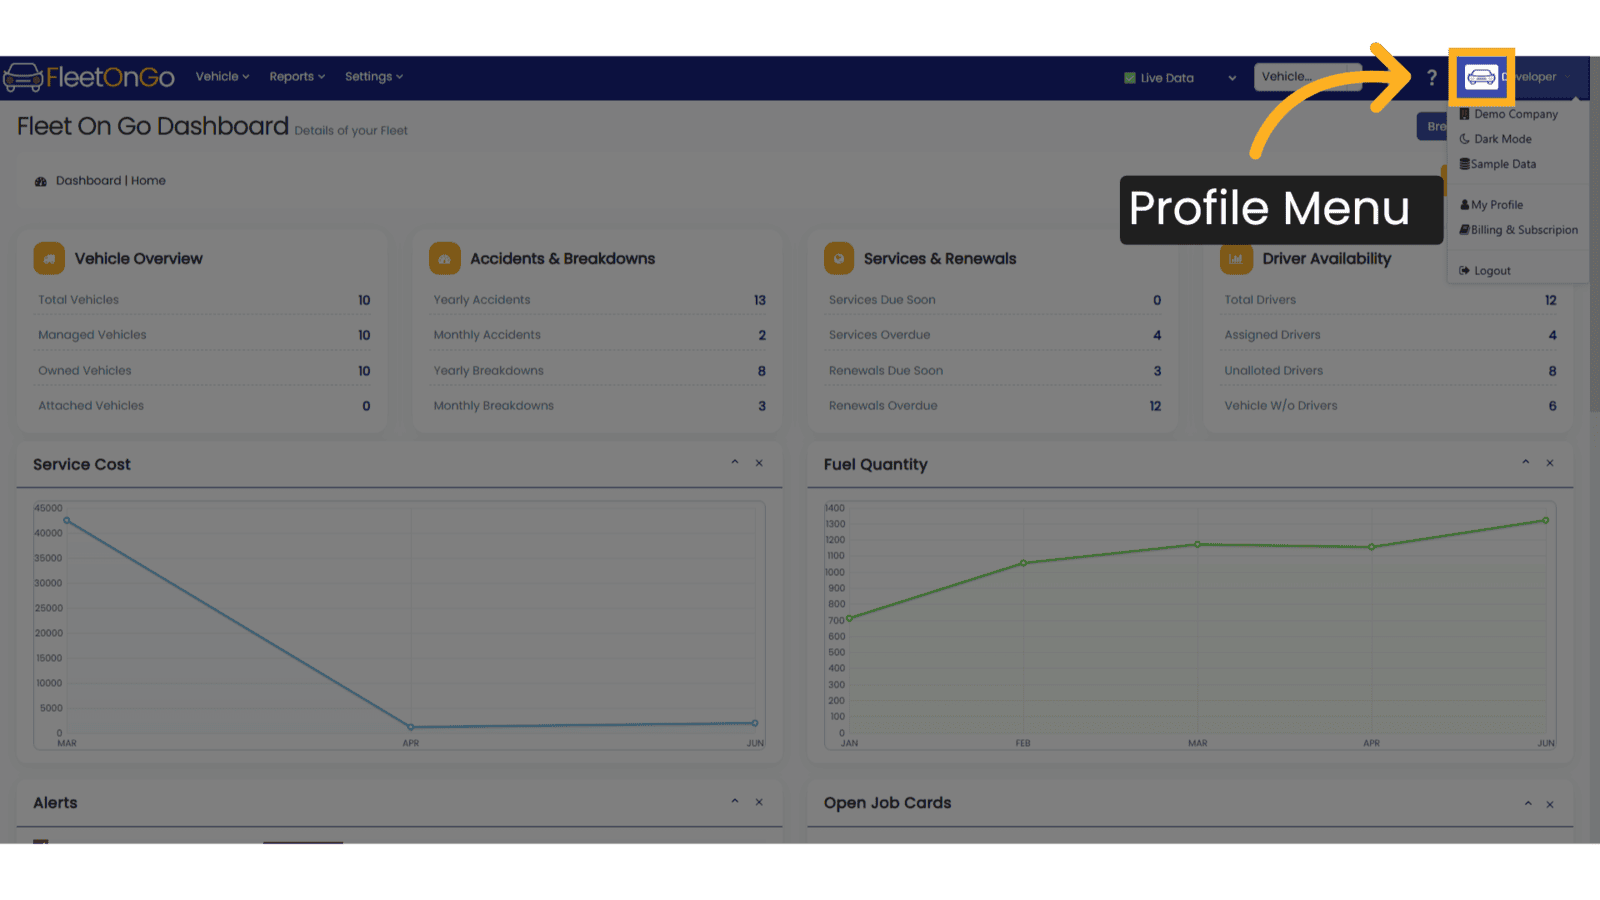
11. Profile Menu
Top right corner will have a profile menu which has profile related options
This guide covered essential steps in navigating Fleetongo for training. From accessing the main dashboard to logging out, you are now equipped to efficiently move through the application. Master the navigation process with ease using the provided instructions.
Related Articles
Category and Sub category
Category and Sub category Introducing the new Category and Subcategory feature in Fleetongo. Go to app.fleetongo.com 1. Introduction This feature allows you to add category and sub category of articles being used for the vehicles making it easier for ...