Add Vehicles
How to Add New Vehicles
This guide will assist you in adding new vehicles within Fleetongo.
Go to app.fleetongo.com
1. Introduction
From selecting the vehicle type to assigning drivers, follow the steps below for seamless vehicle management.
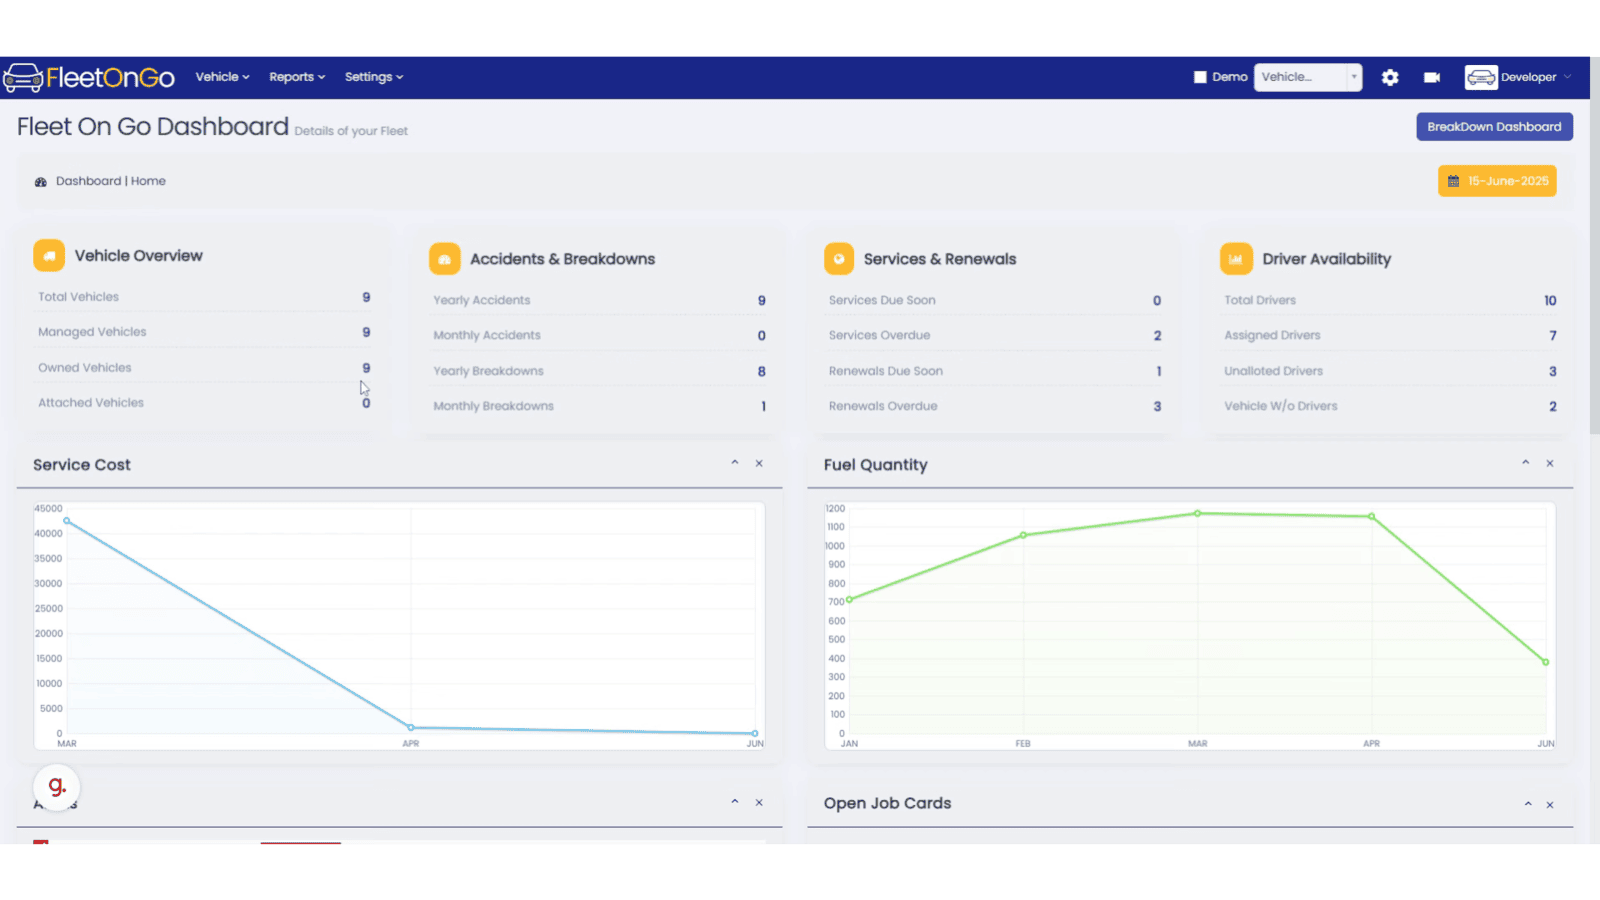
2. Click "Vehicle"
Access the vehicles section in Top Menu.

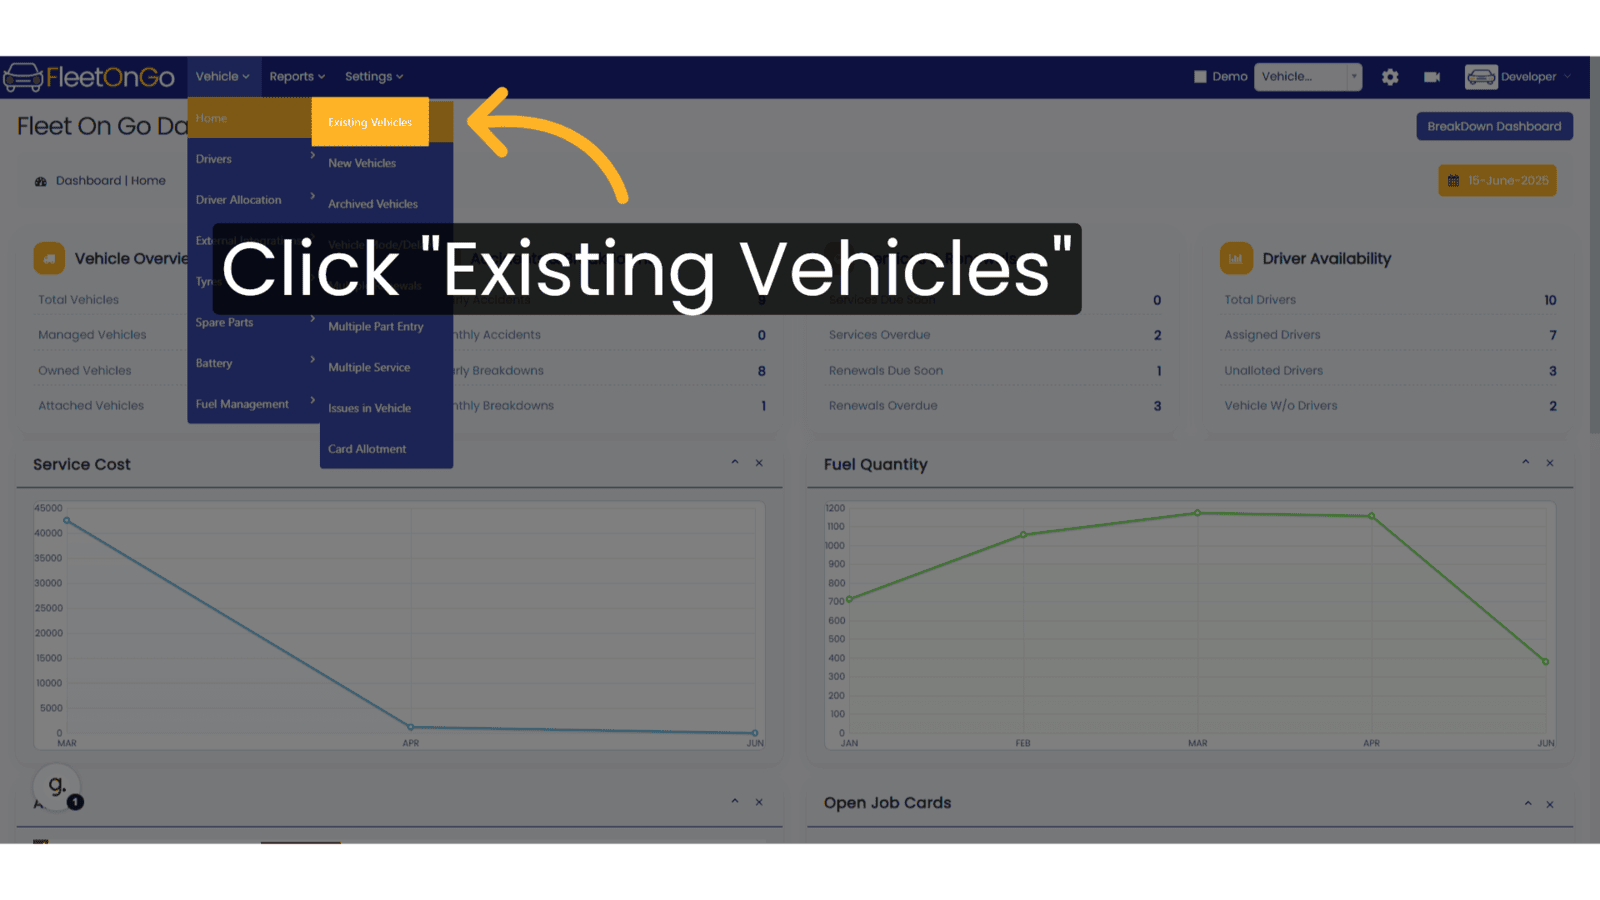
3. Click "Existing Vehicles"
Navigate to the existing vehicles tab.
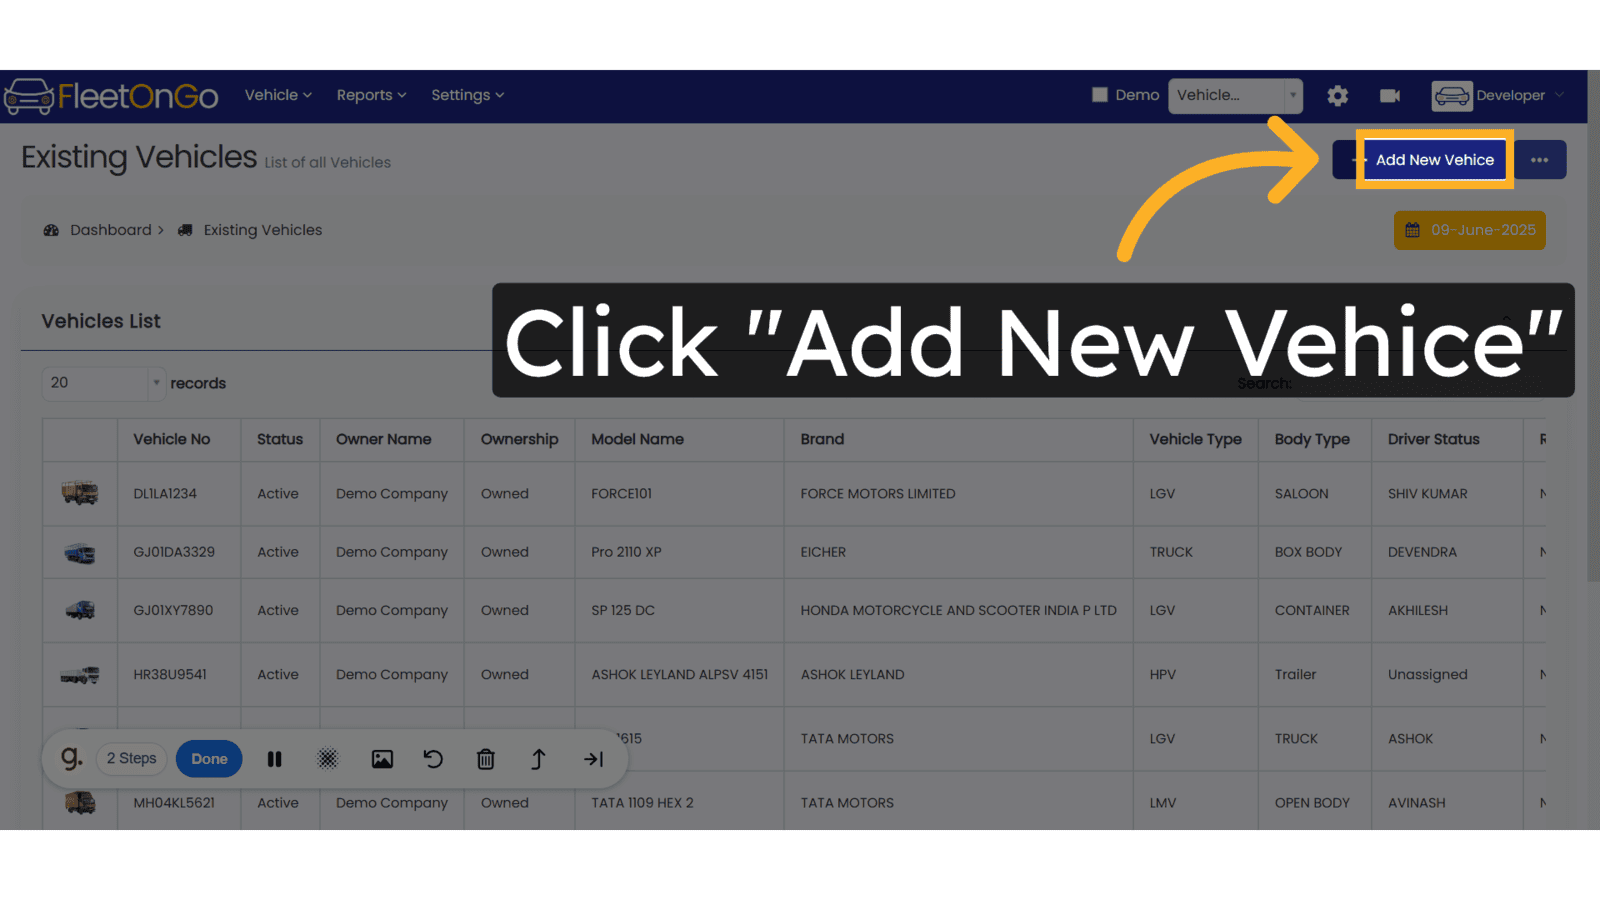
4. Click "Add New Vehice"
Click on the Add New Vehicle on top right corner to Initiate adding a new vehicle.
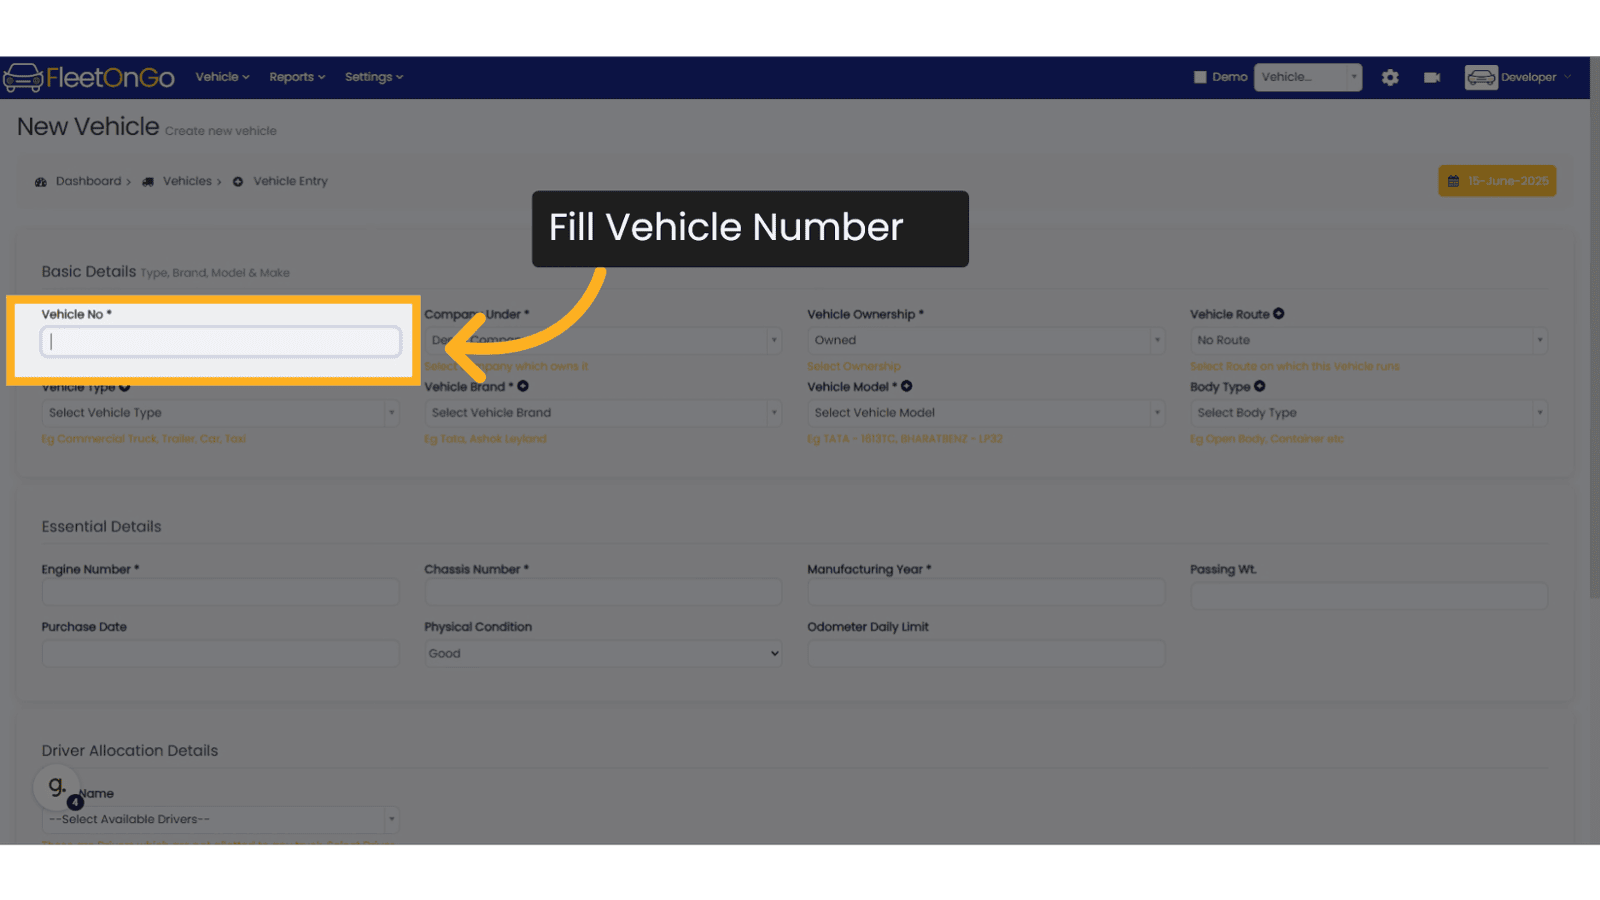
5. Fill Vehicle Number
Fill vehicle number or plate number
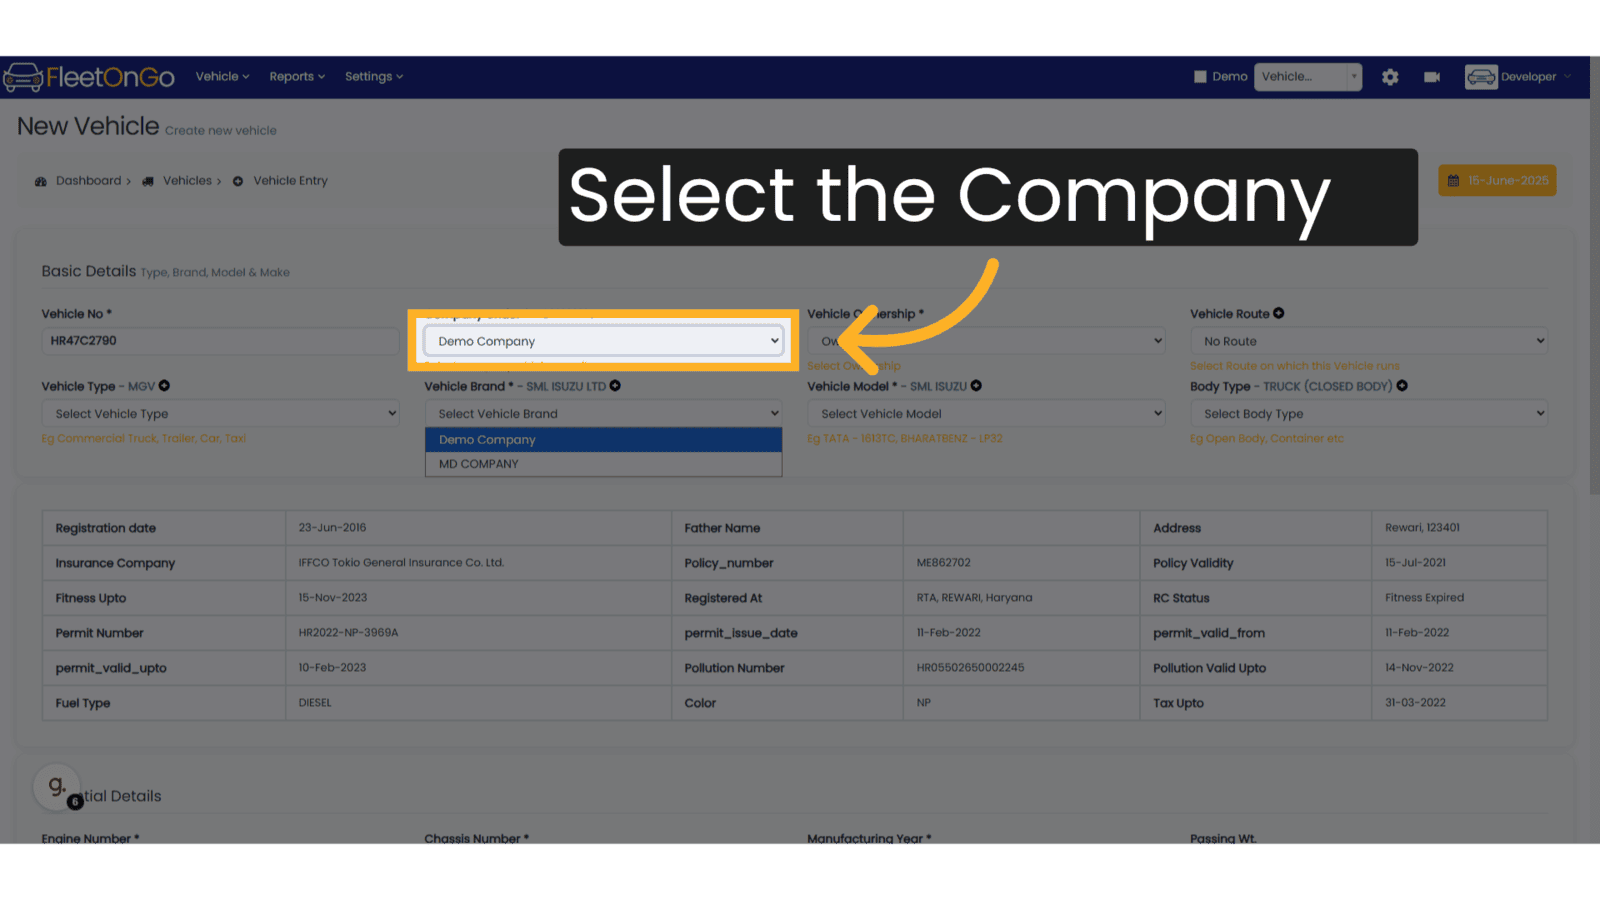
6. Select the Company
Select the Company under which the vehicle is Registered.
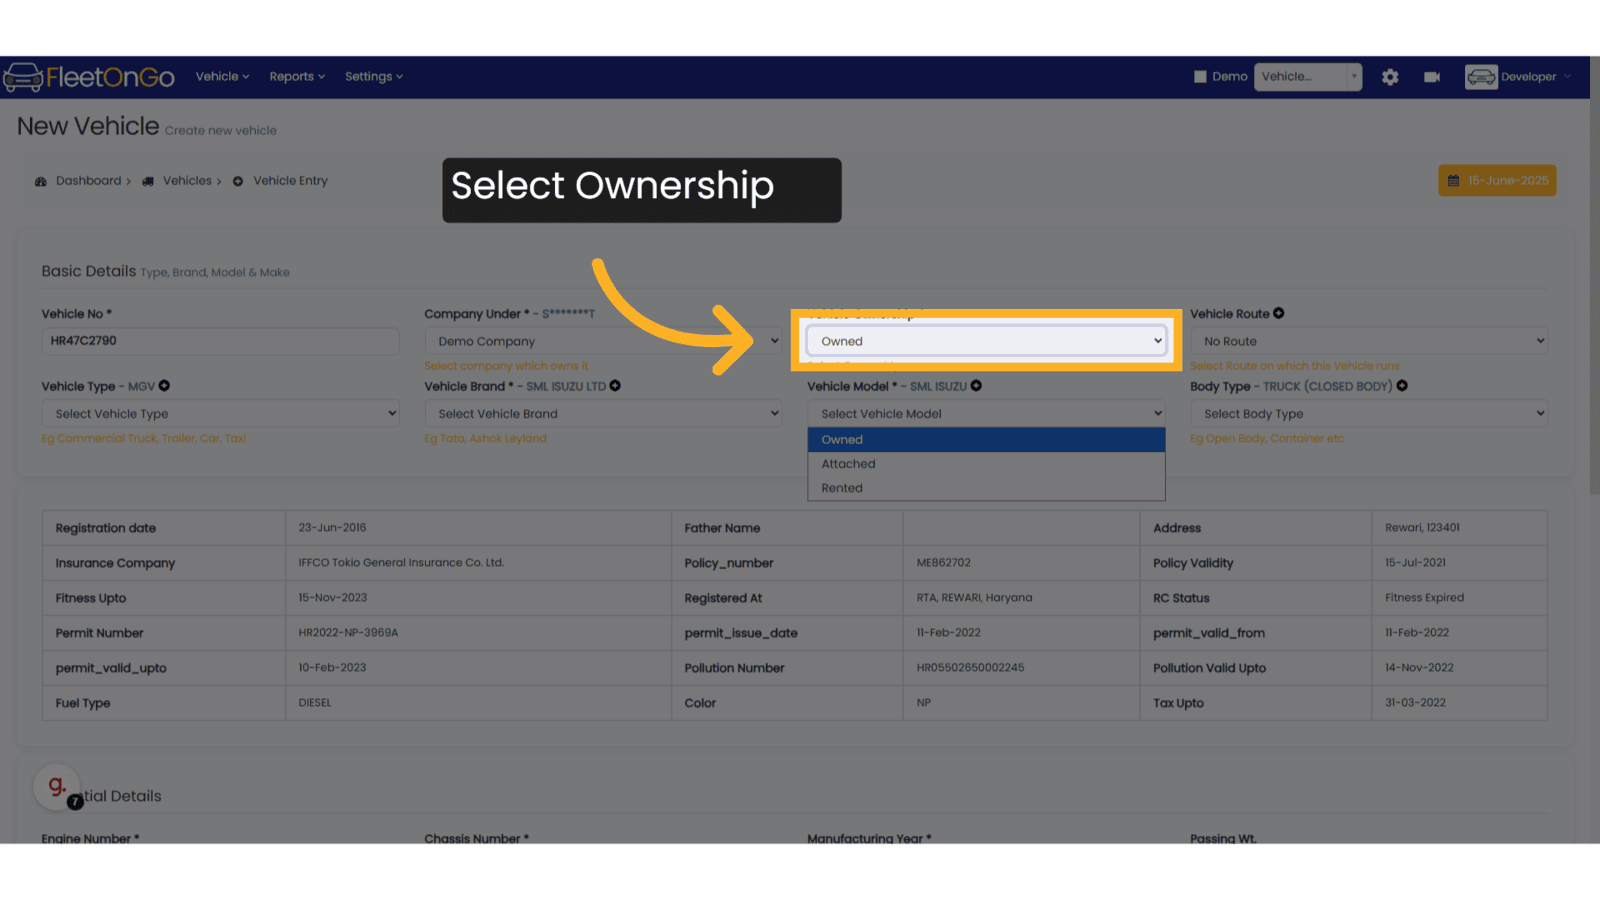
7. Choose Vehicle Ownership
Choose the ownership status from the list
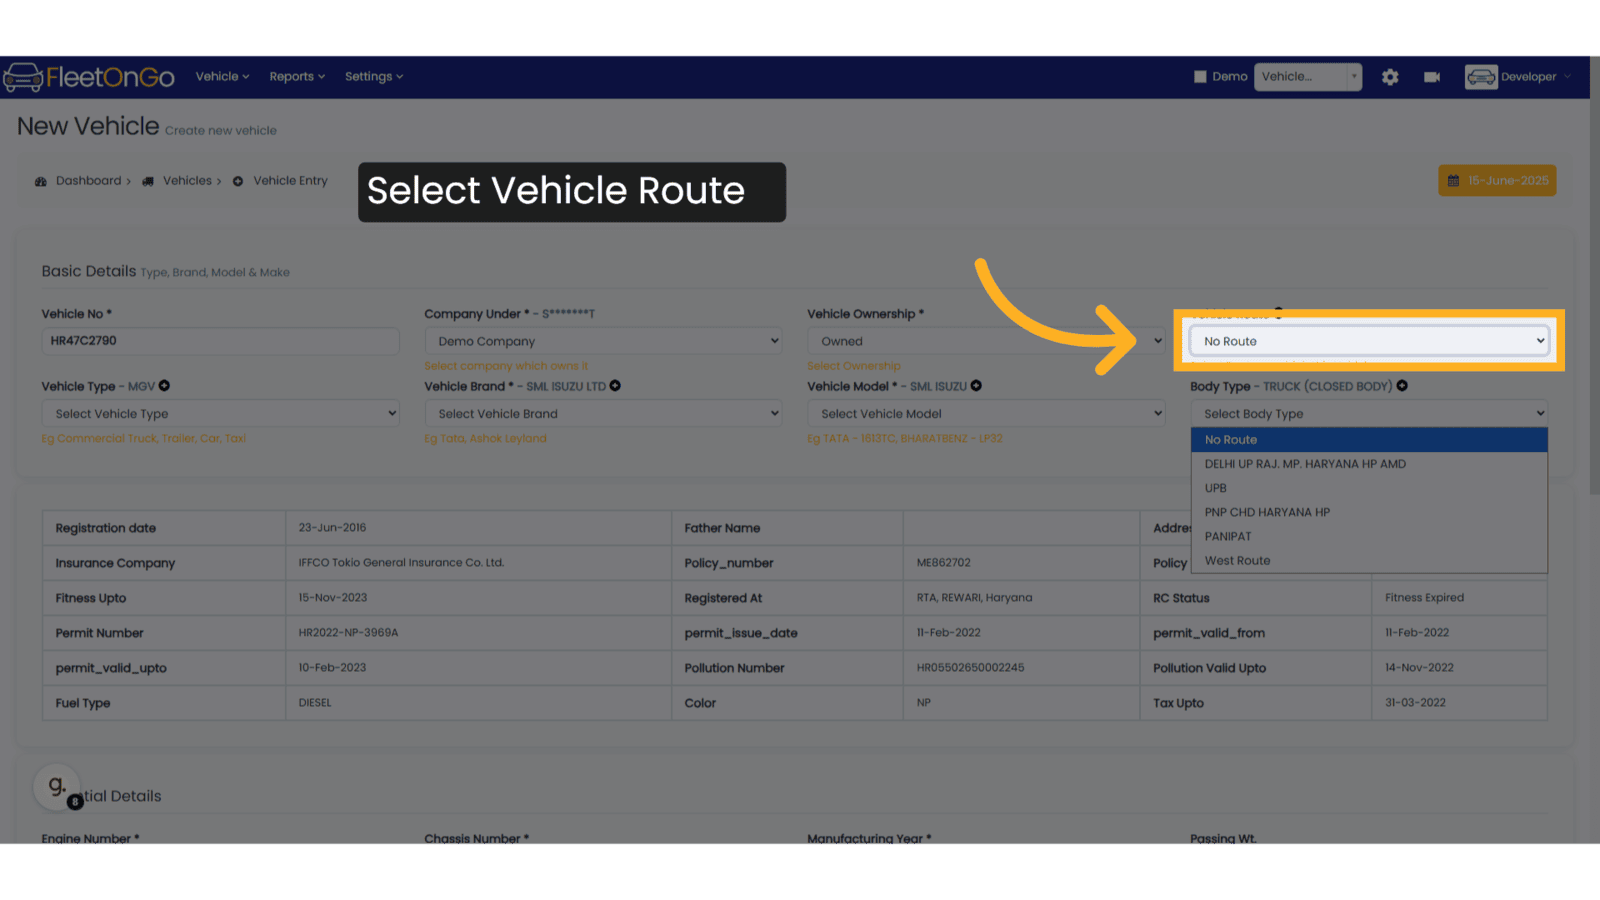
8. Select Route
Select Route of the Vehicle
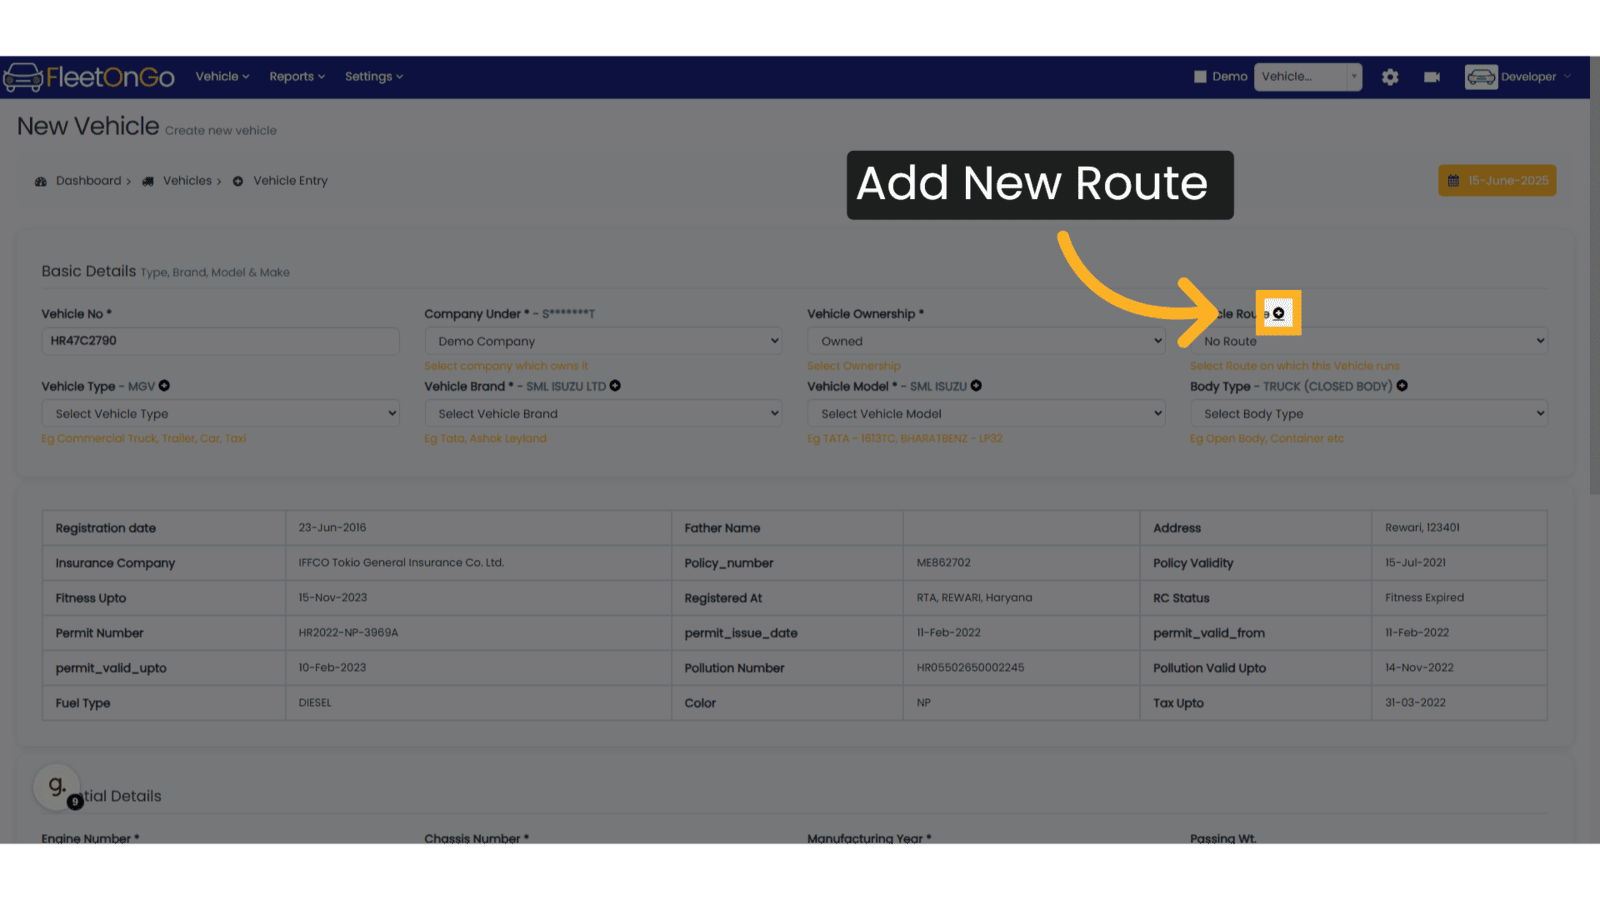
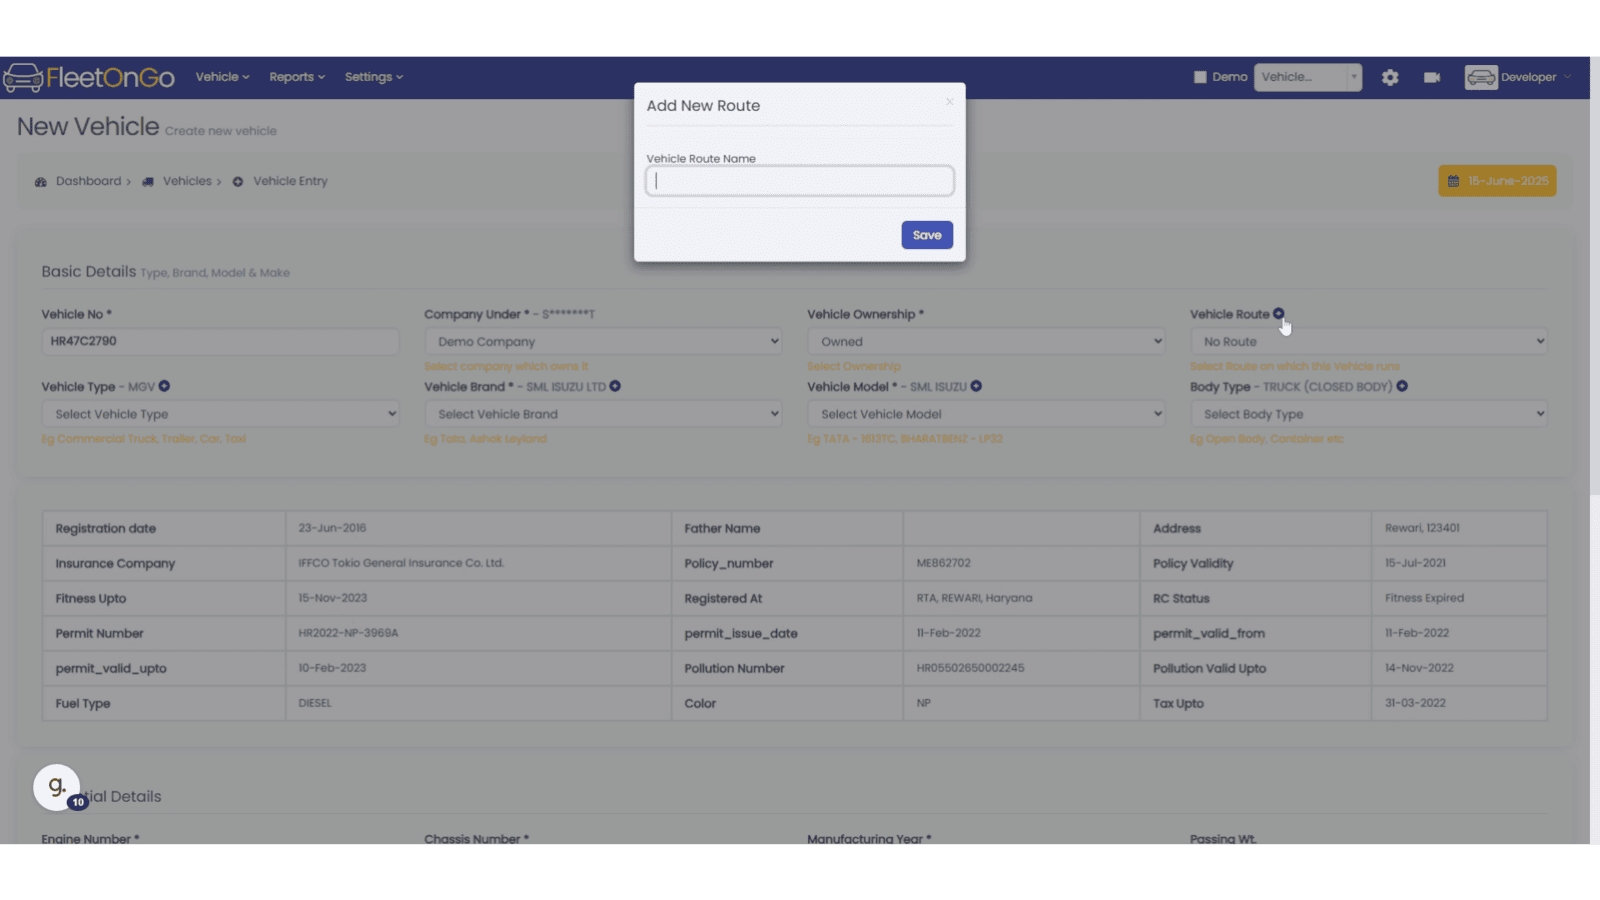
9. Add New Route
If you want to add new routes, click on the Plus button above the Route textbox.
10. Add New Route Name
In this popup, Add New Route Name, I am taking North Route for example
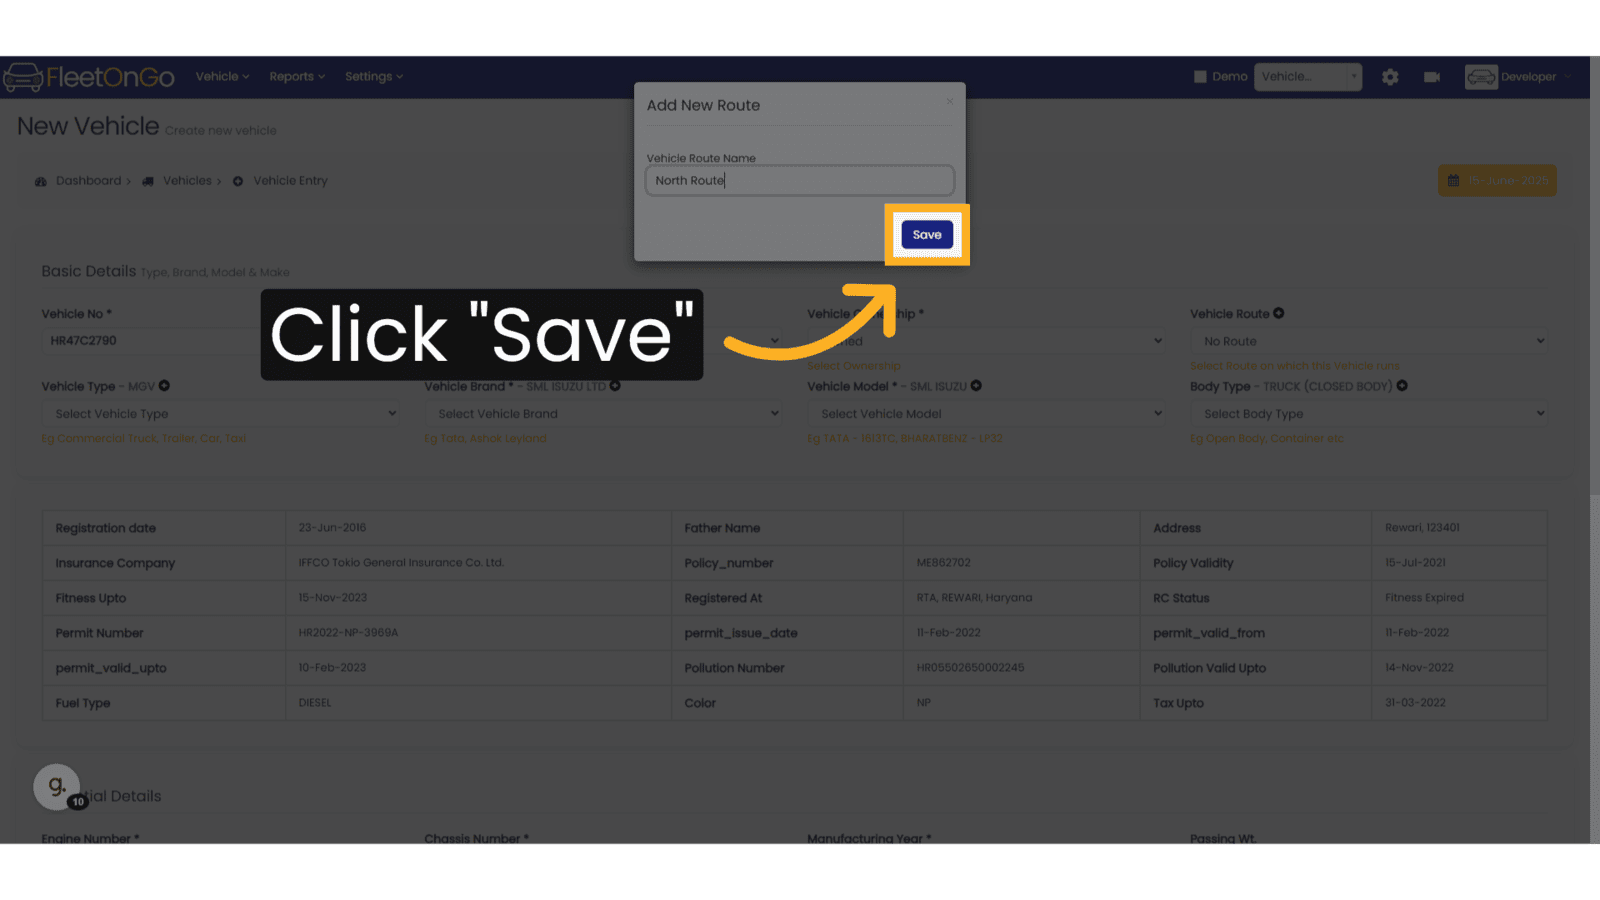
11. Click "Save Route"
Click to Save the Route button.
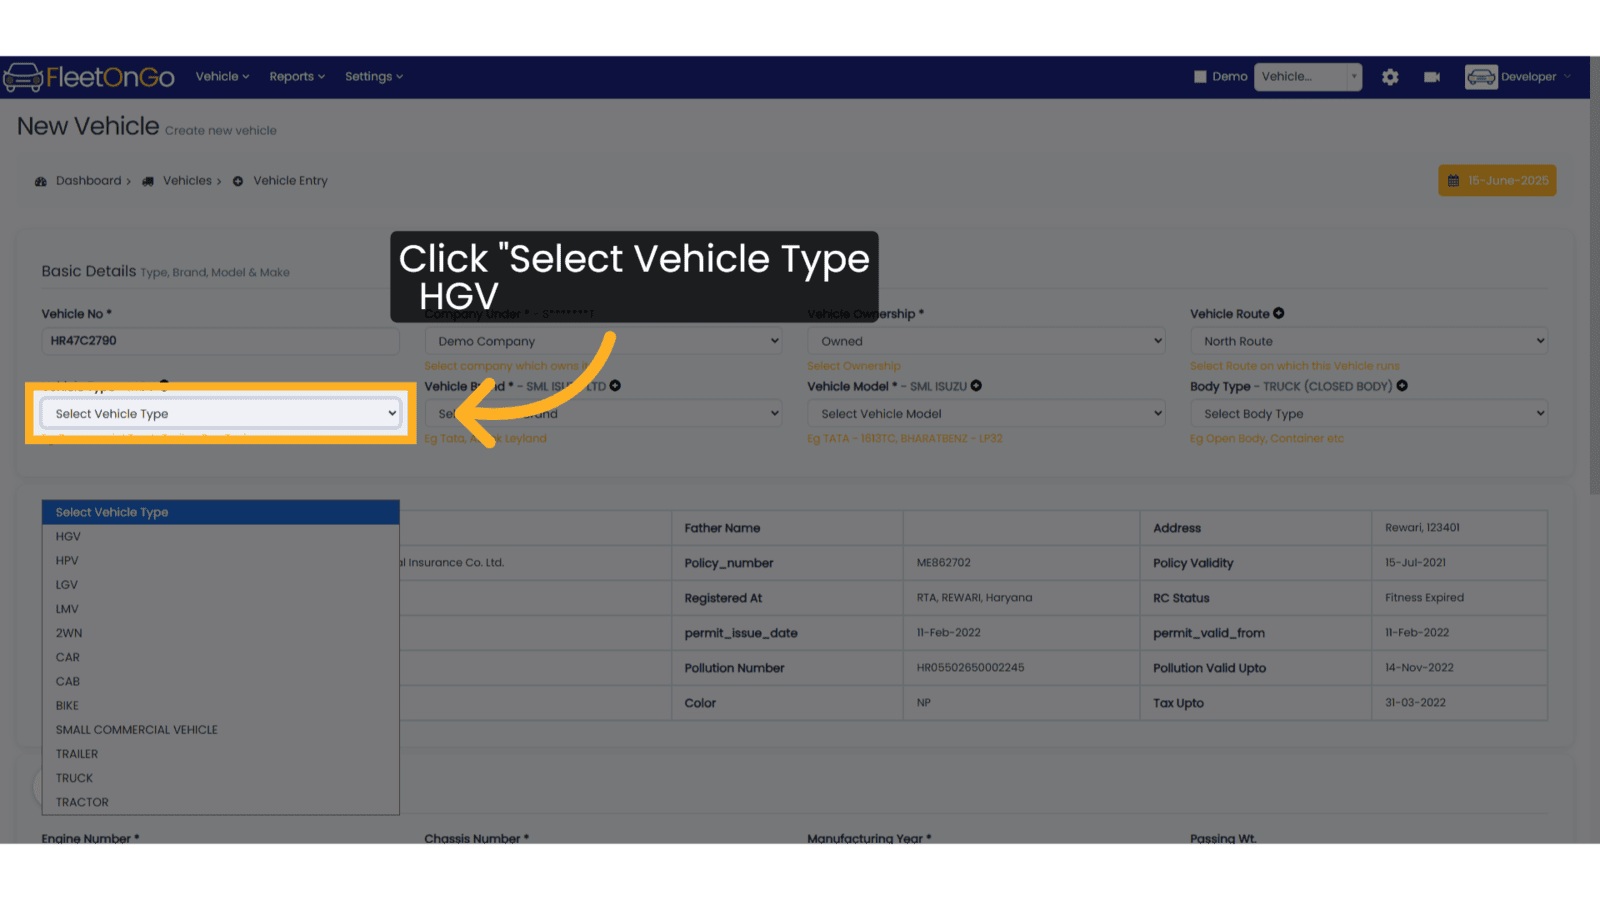
12. Select Vehicle Type
Choose Vehicle Types from the list.
13. Add new Vehicle Type
If the Vehicle Type is no existing, new vehicle type can me added.
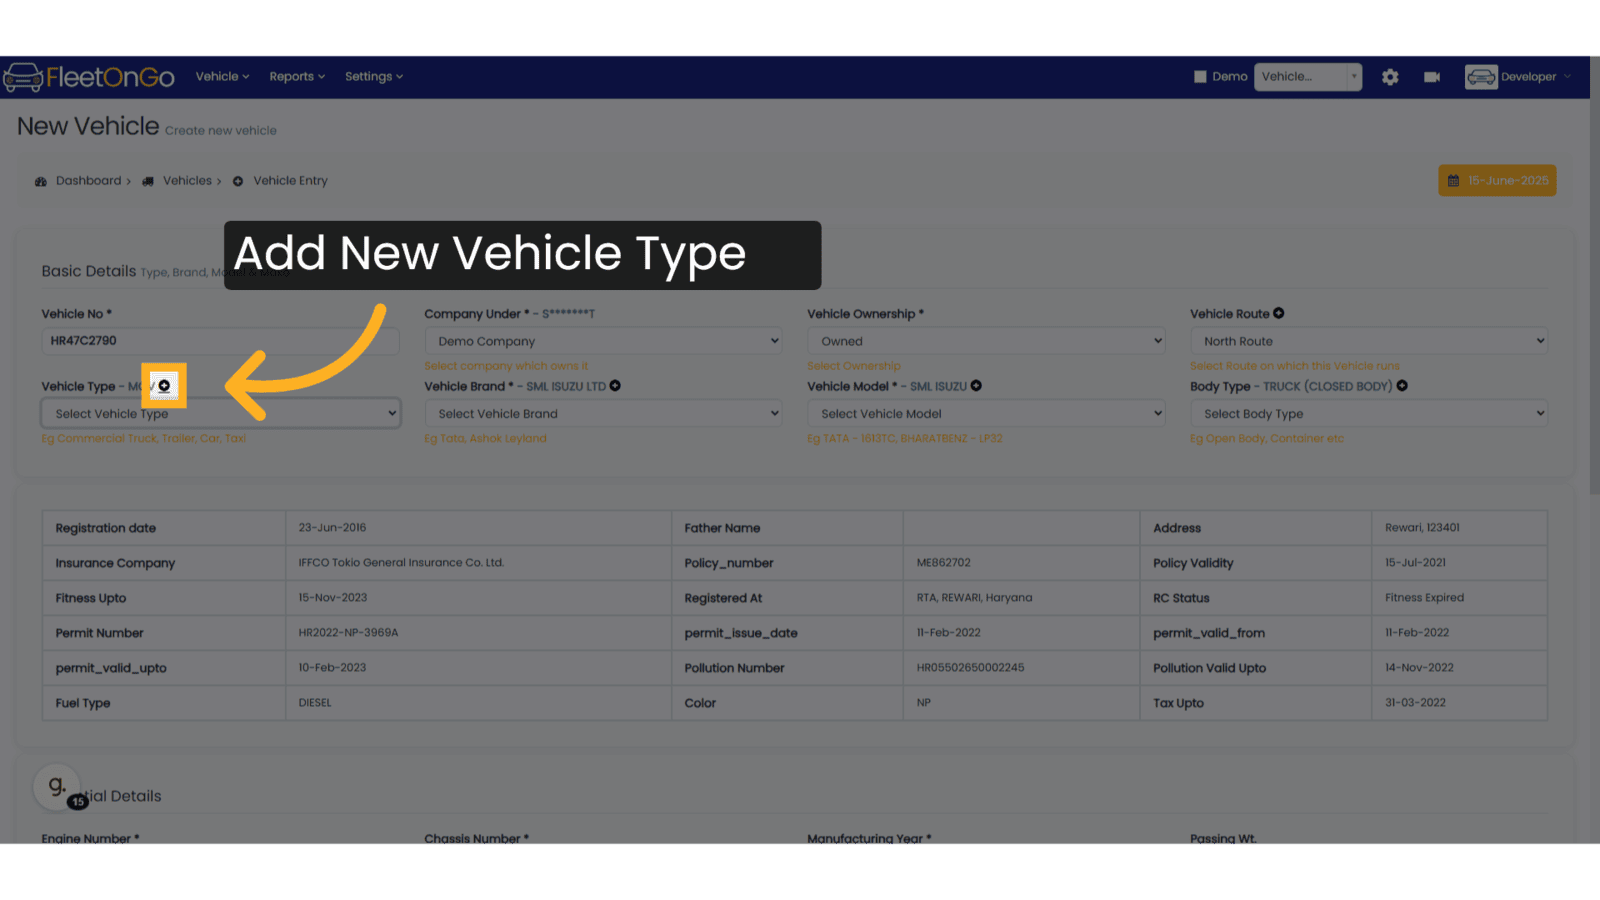
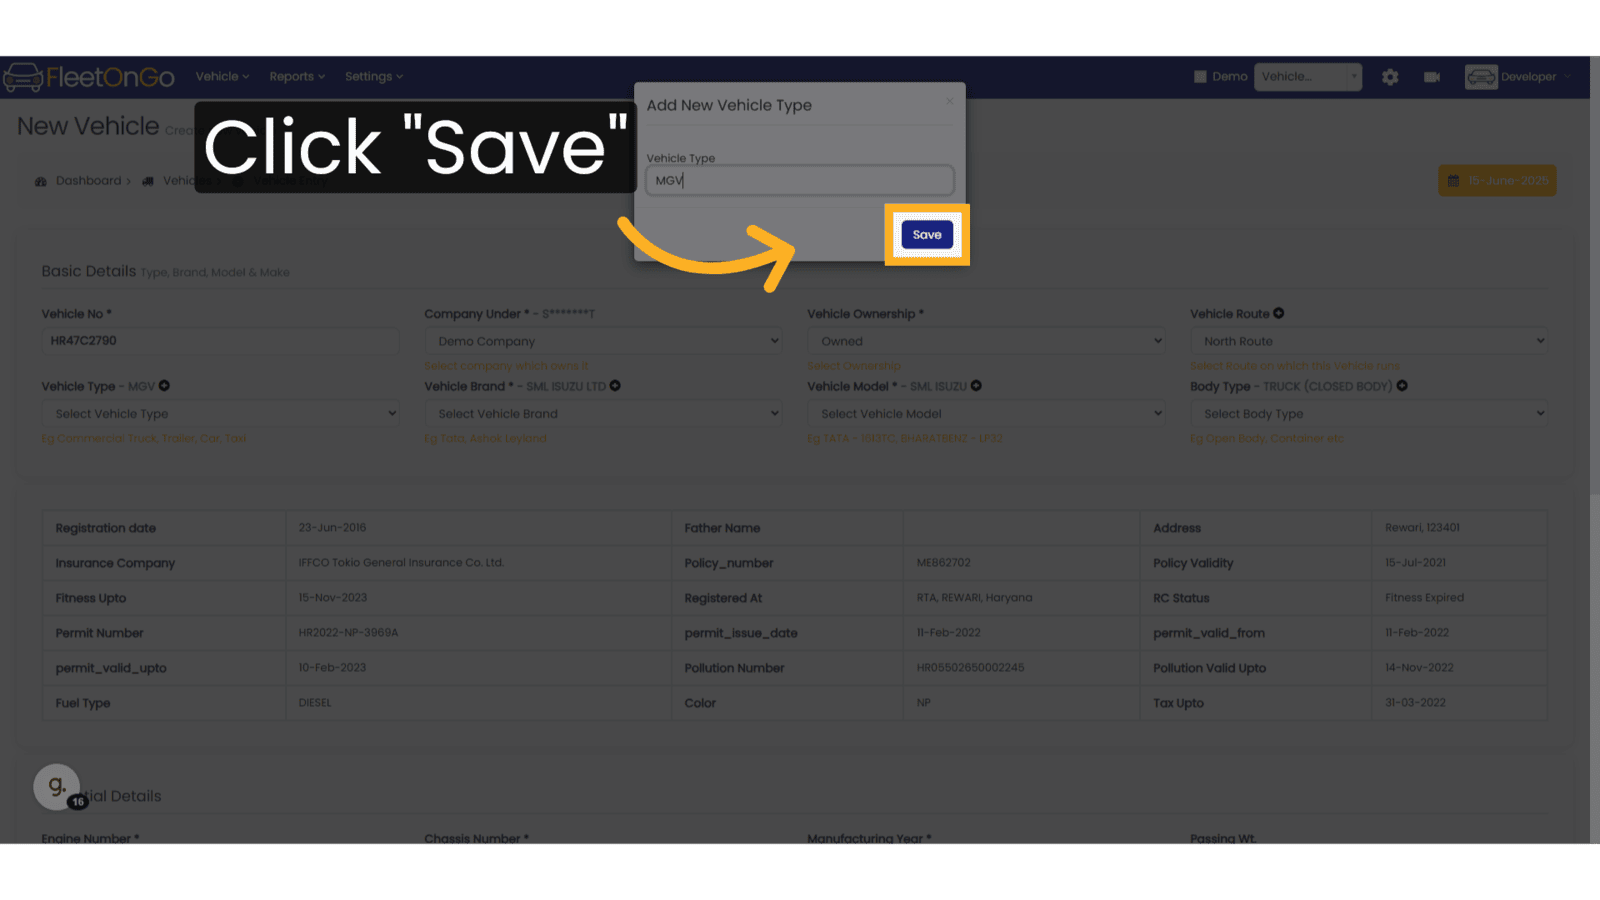
14. Add New Vehicle Type
Add New Vehicle Type in the Popup and click on save.
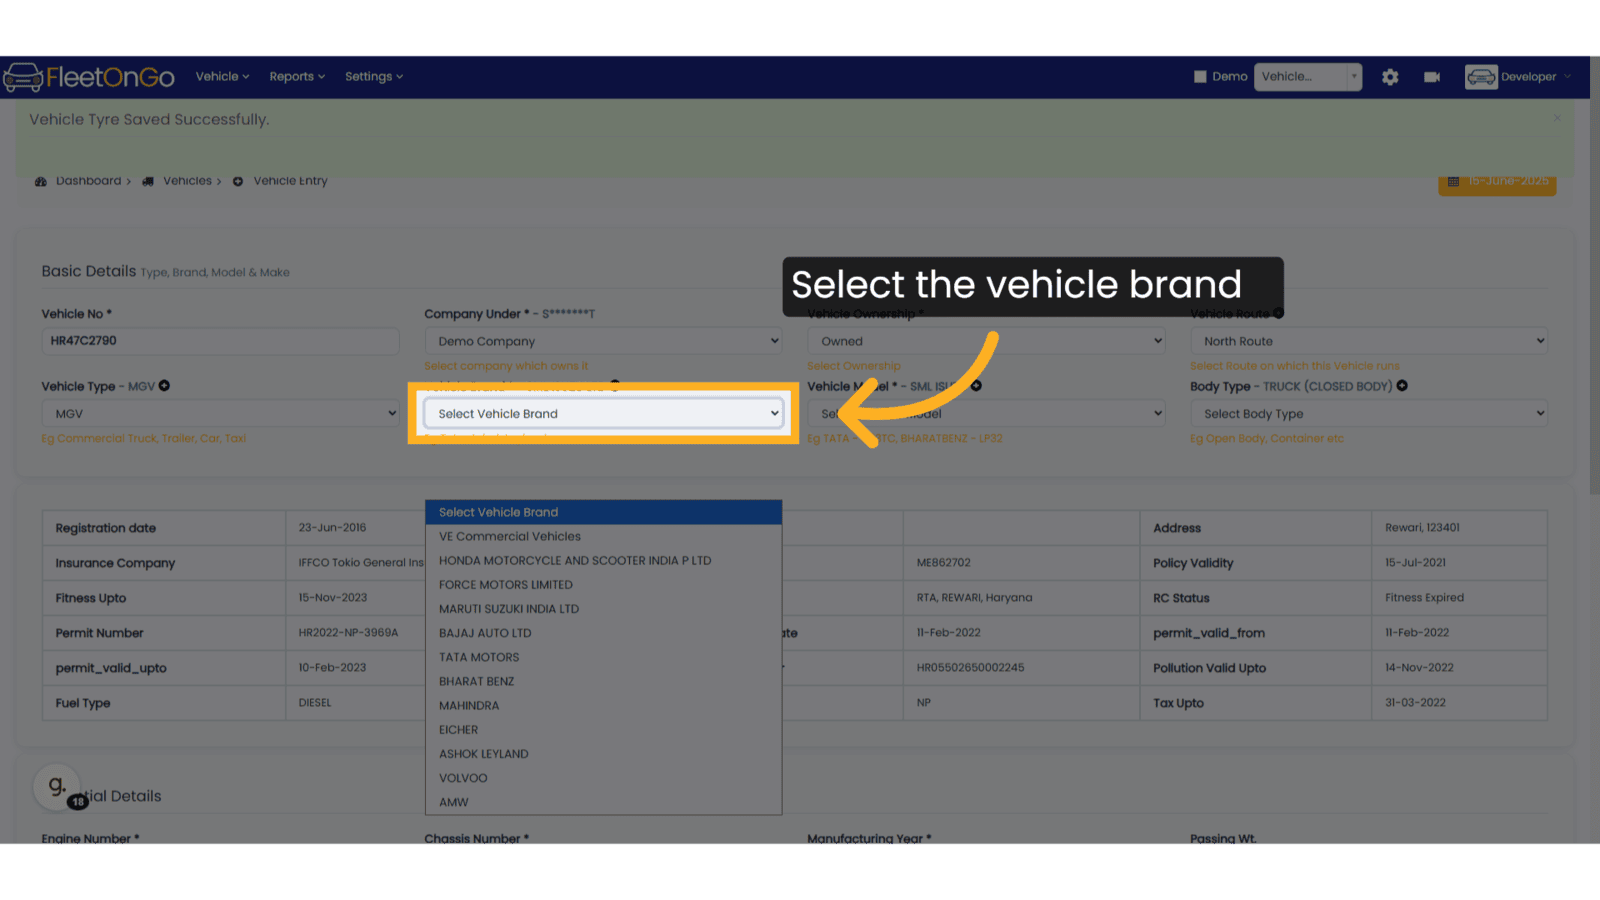
15. Select the Vehicle Brand
Select the brand of the vehicle from the existing list.
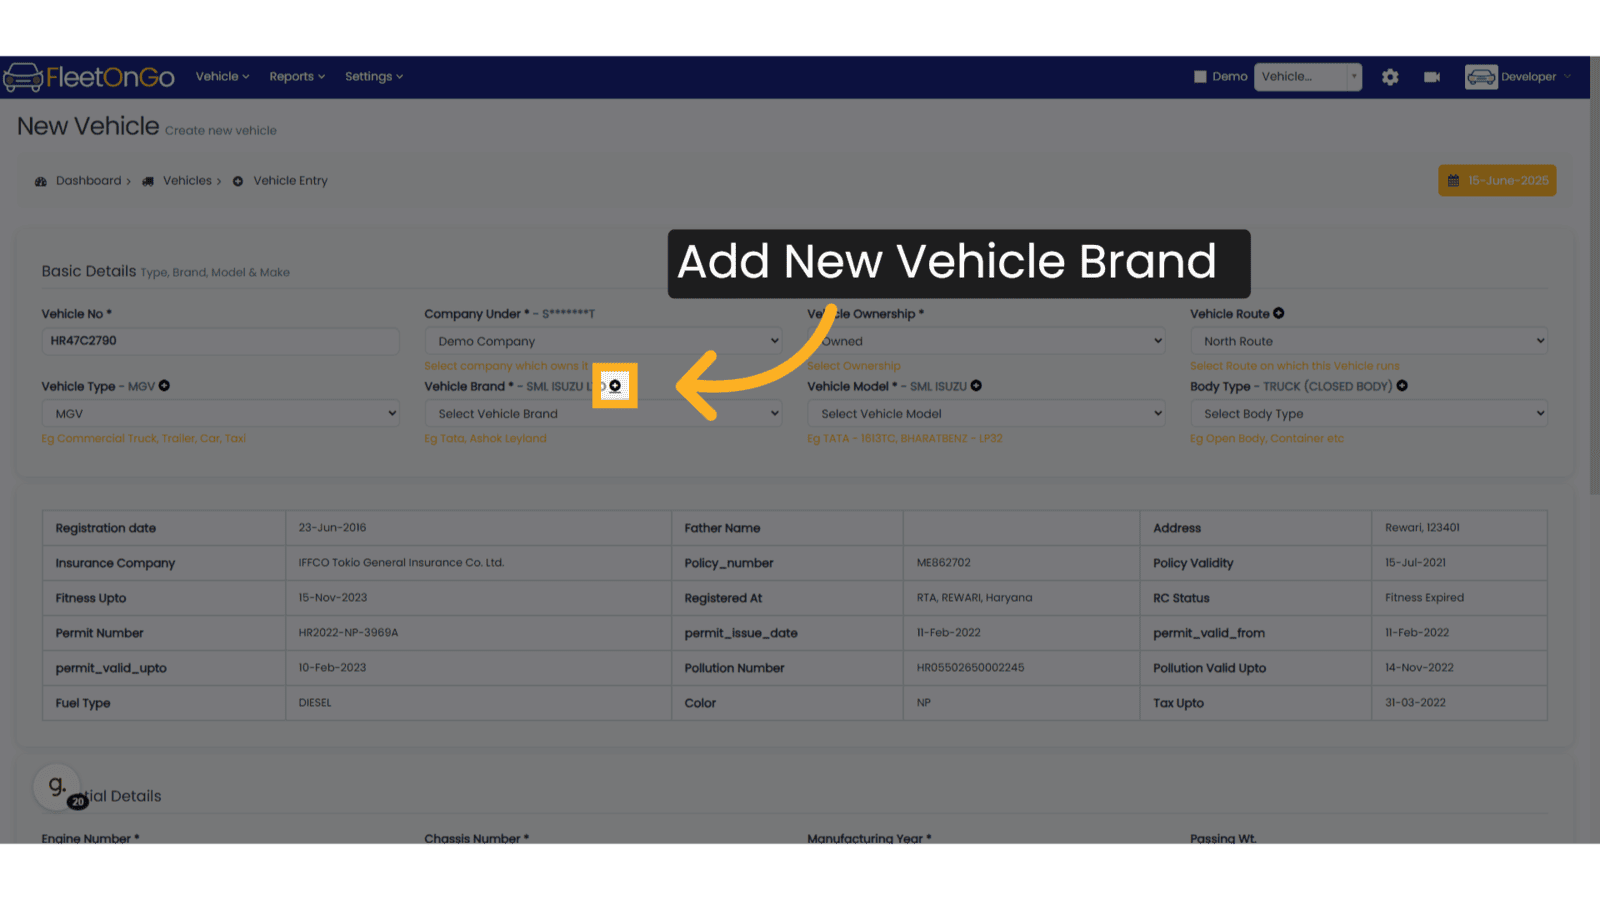
16. Add new Vehicle Brand
If the Vehicle brand is not available you can click on the plus button to add new vehicle brand.
17. Add Vehicle Brand
Enter the new vehicle brand you want to add in the popup
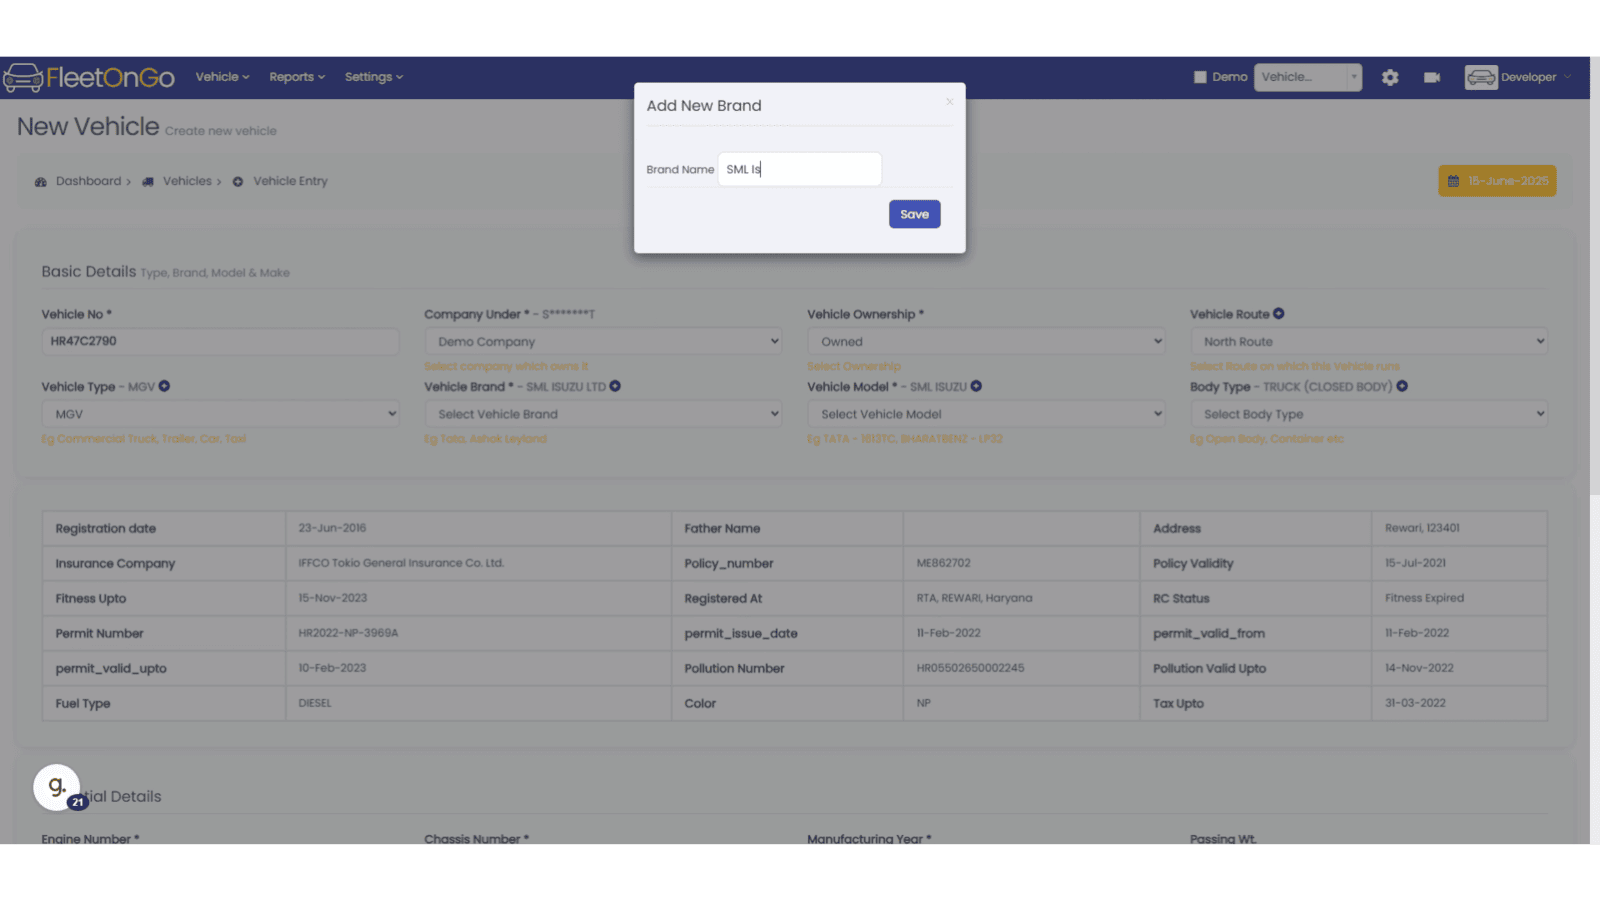
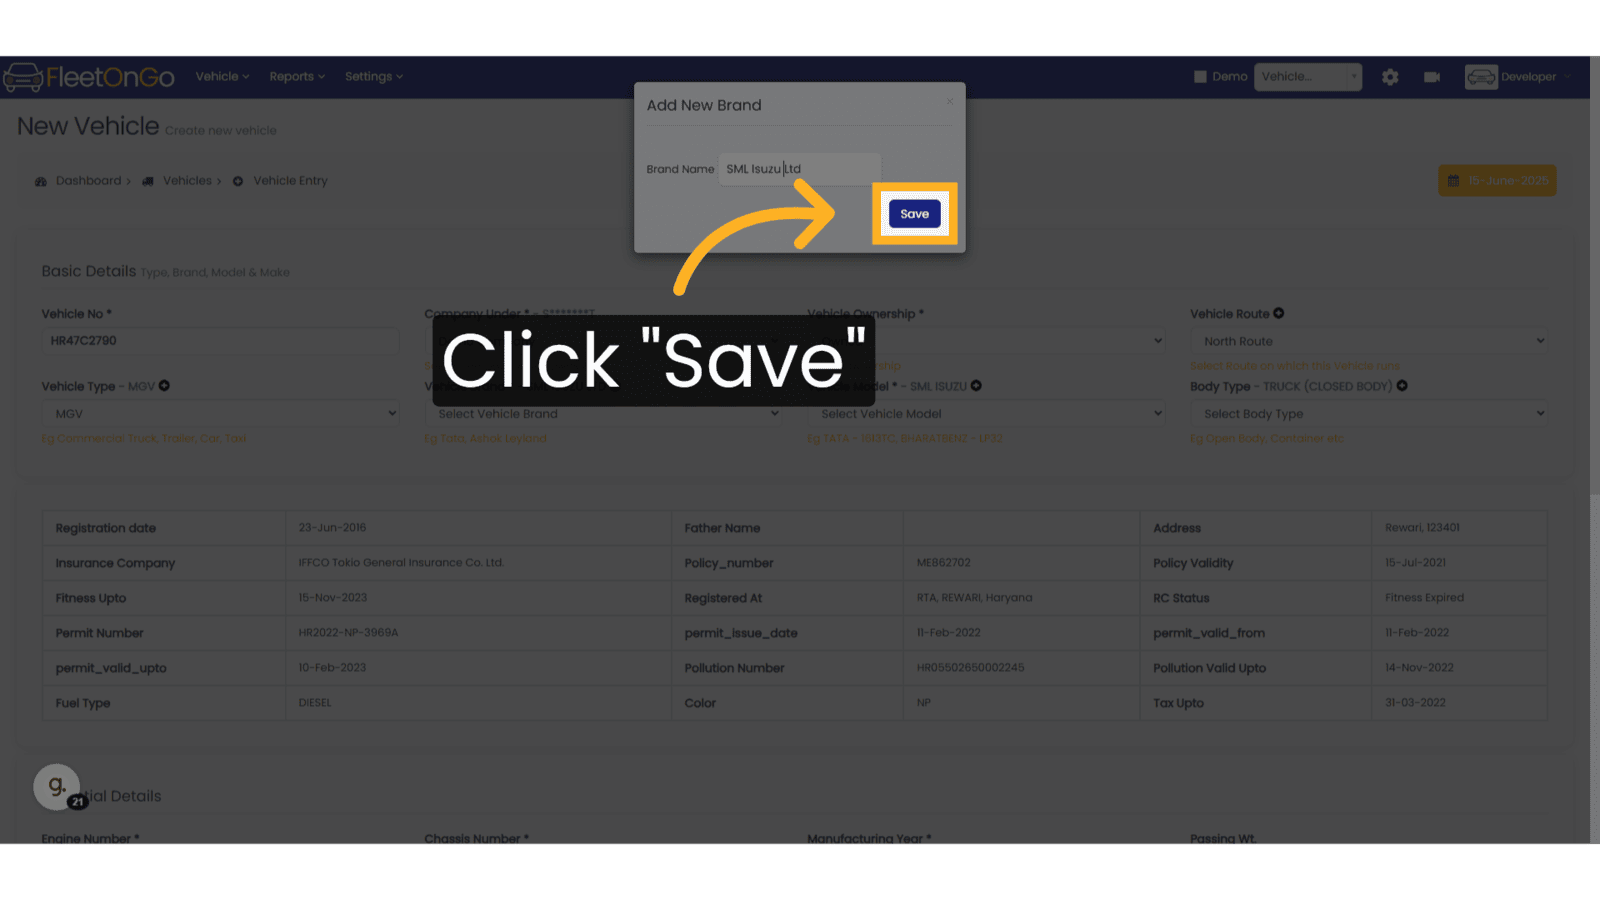
18. Save Vehicle Brand
Click Save to save the new vehicle brand, which can be used in future once made. You can always edit these in settings.
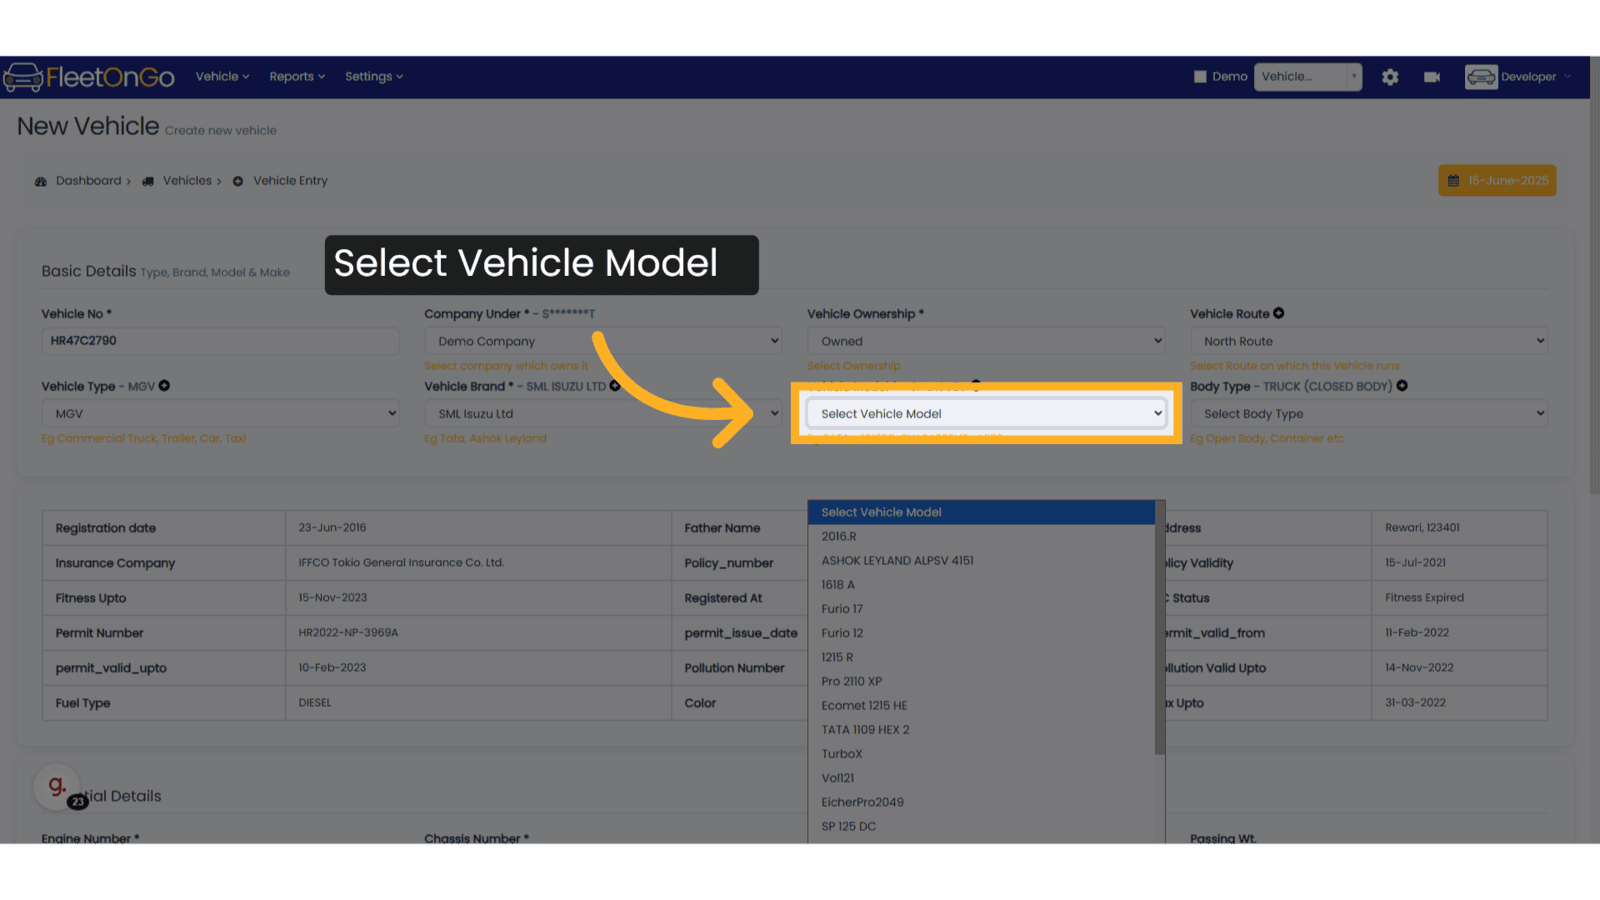
19. Select Vehicle Model
The Vehicle model will show depending on the vehicle brand you have selected.
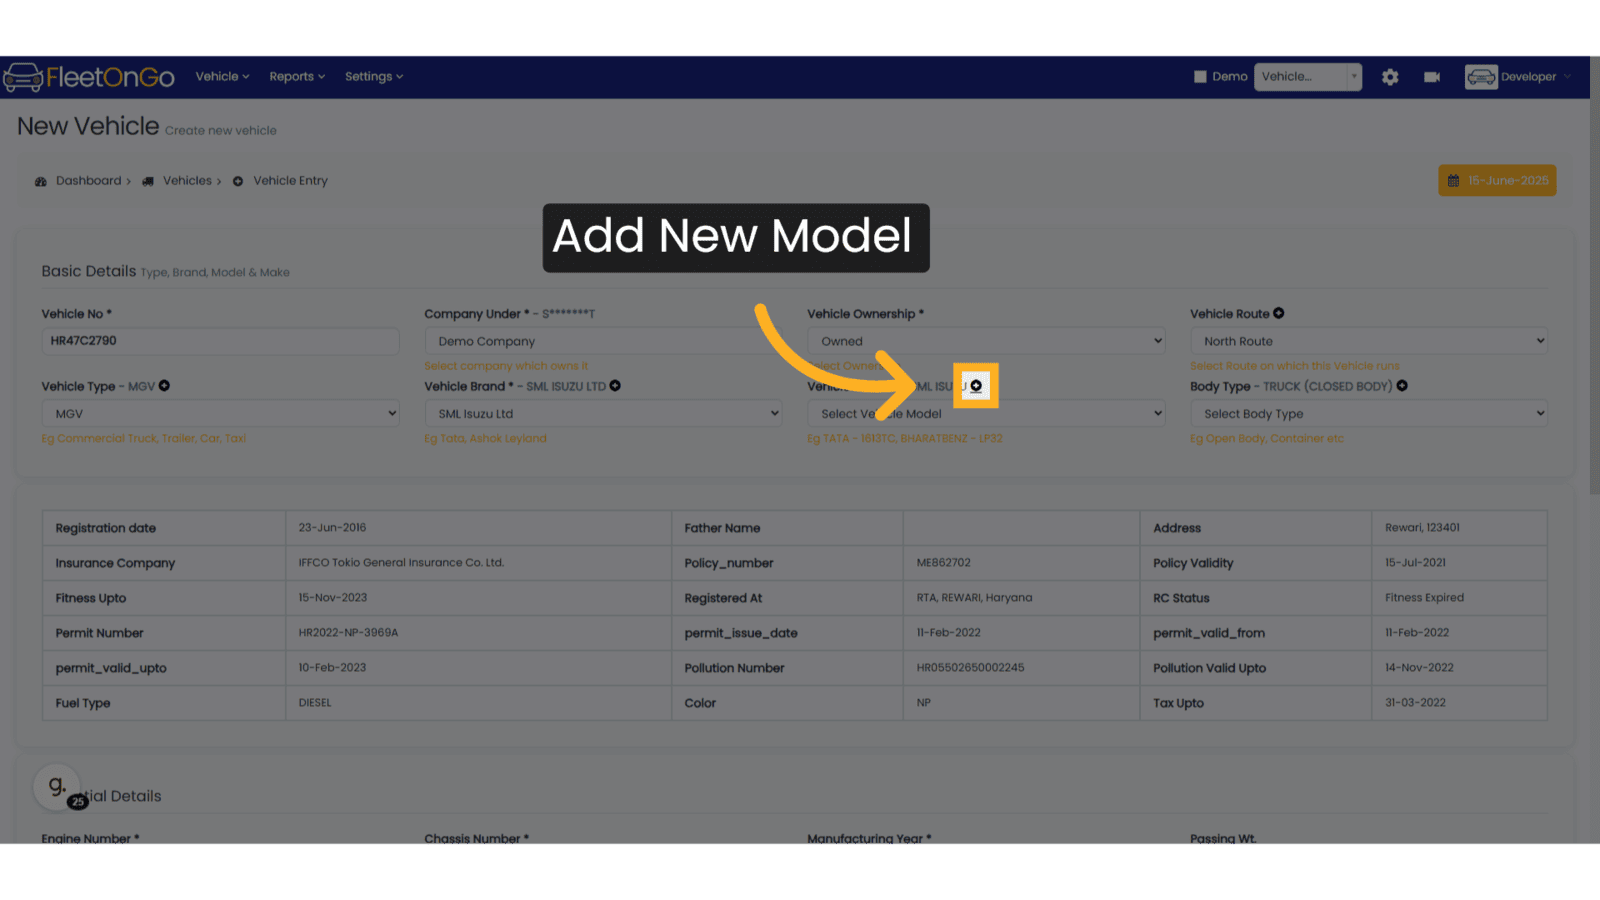
20. Add New Vehicle Brand
If the you want to add Vehicle Brand, click on plus button.
21. Add Vehicle Brand
Enter Vehicle Brand Name, then enter number of tyres the vehicle consists.
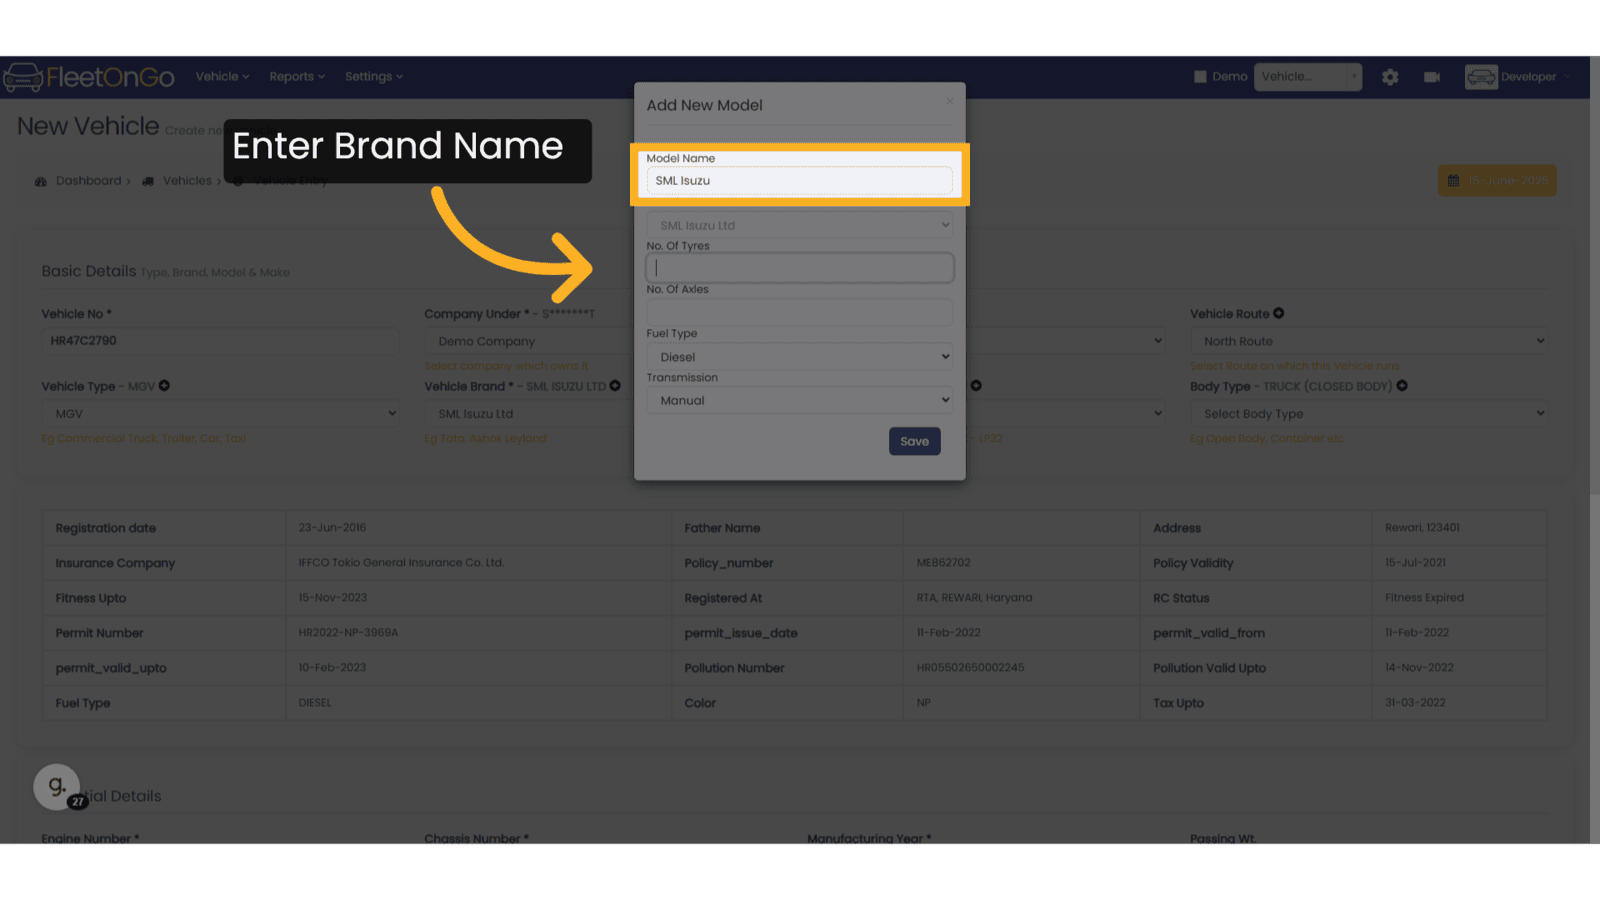
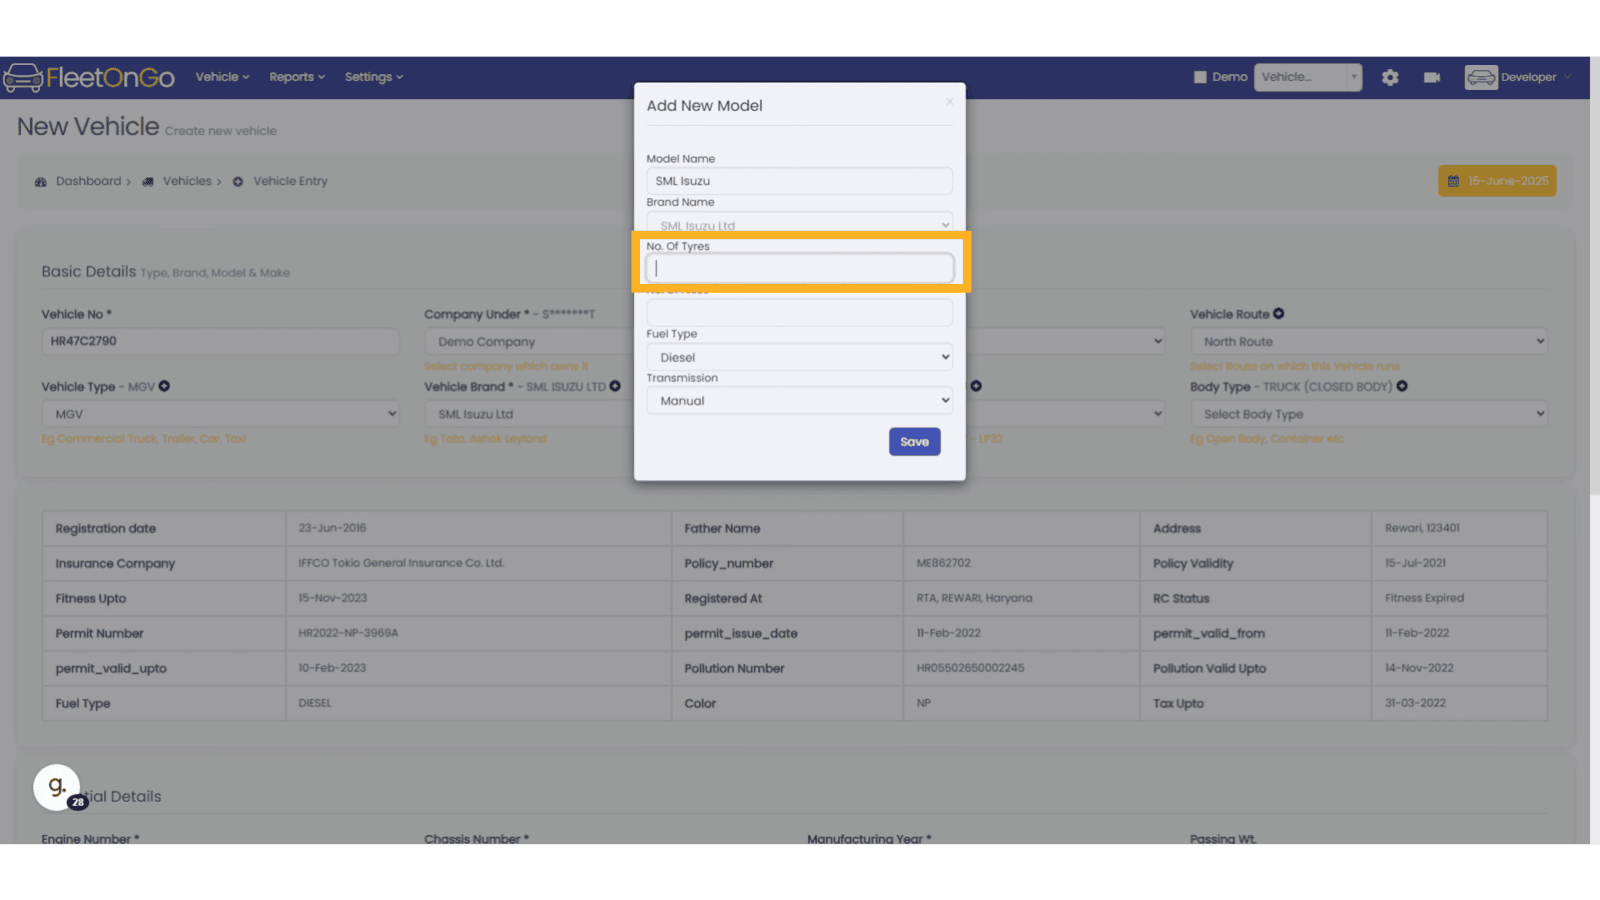
22. No of Tyres in vehicle
Enter the total tyres in vehicle carefully, as you will later mount tyres on these positions.
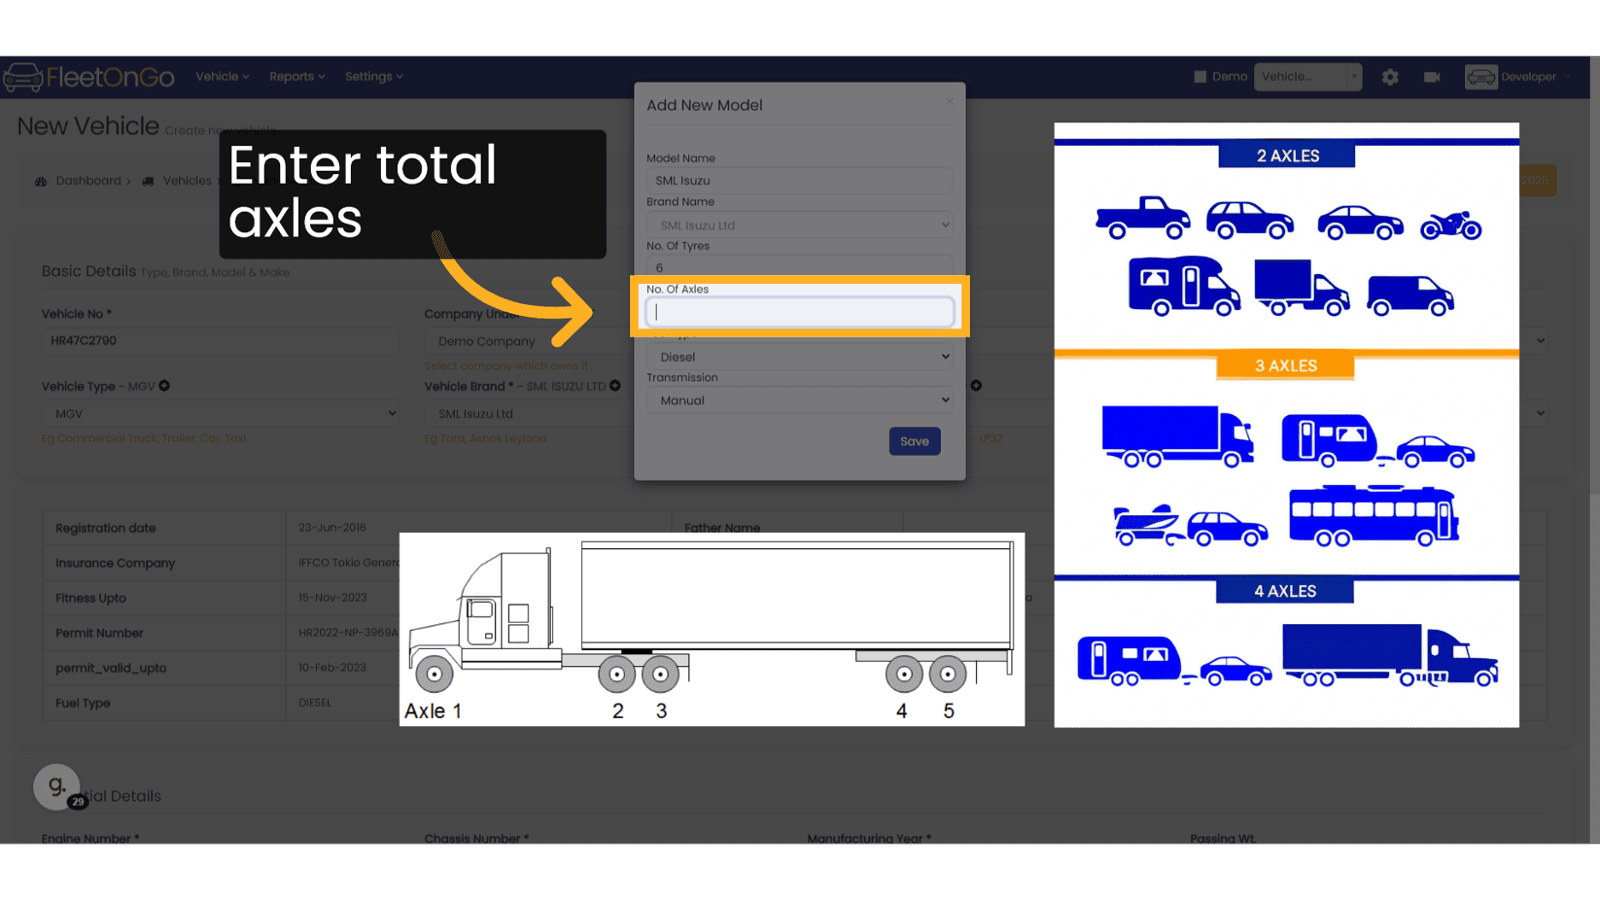
23. Enter Number of Axles
Write the Number of Axles, the images shown the numbering of the vehicle, you have to check you vehicle model and write number of axles, this step is important, as you will allot these tyres to this vehicle.
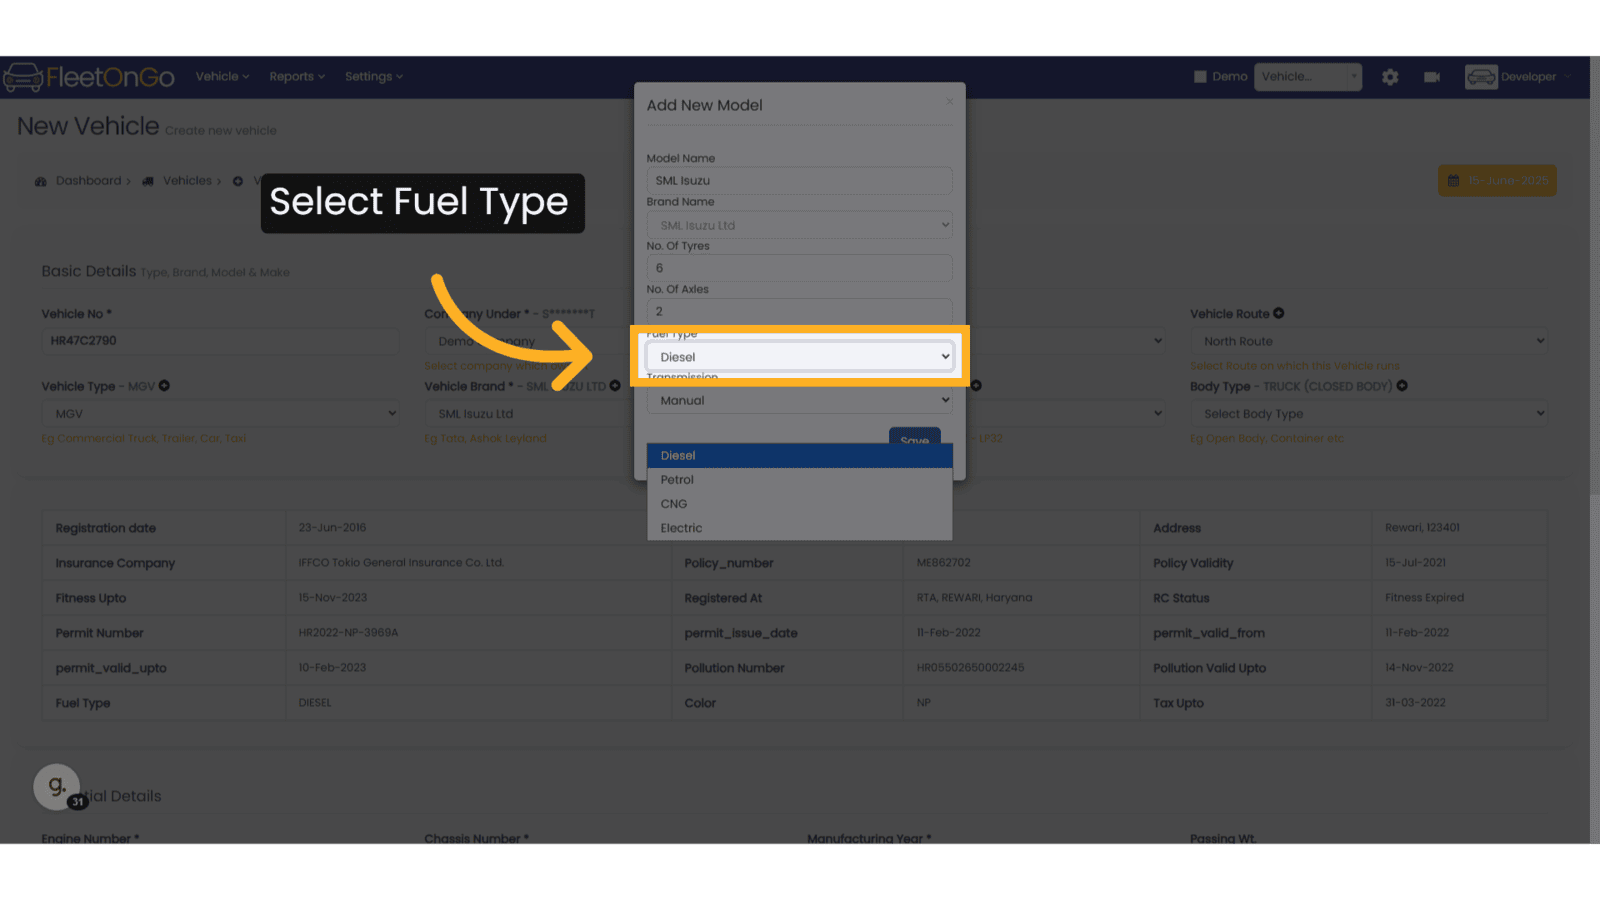
24. Select Fuel Type
Select Fuel Type from the List
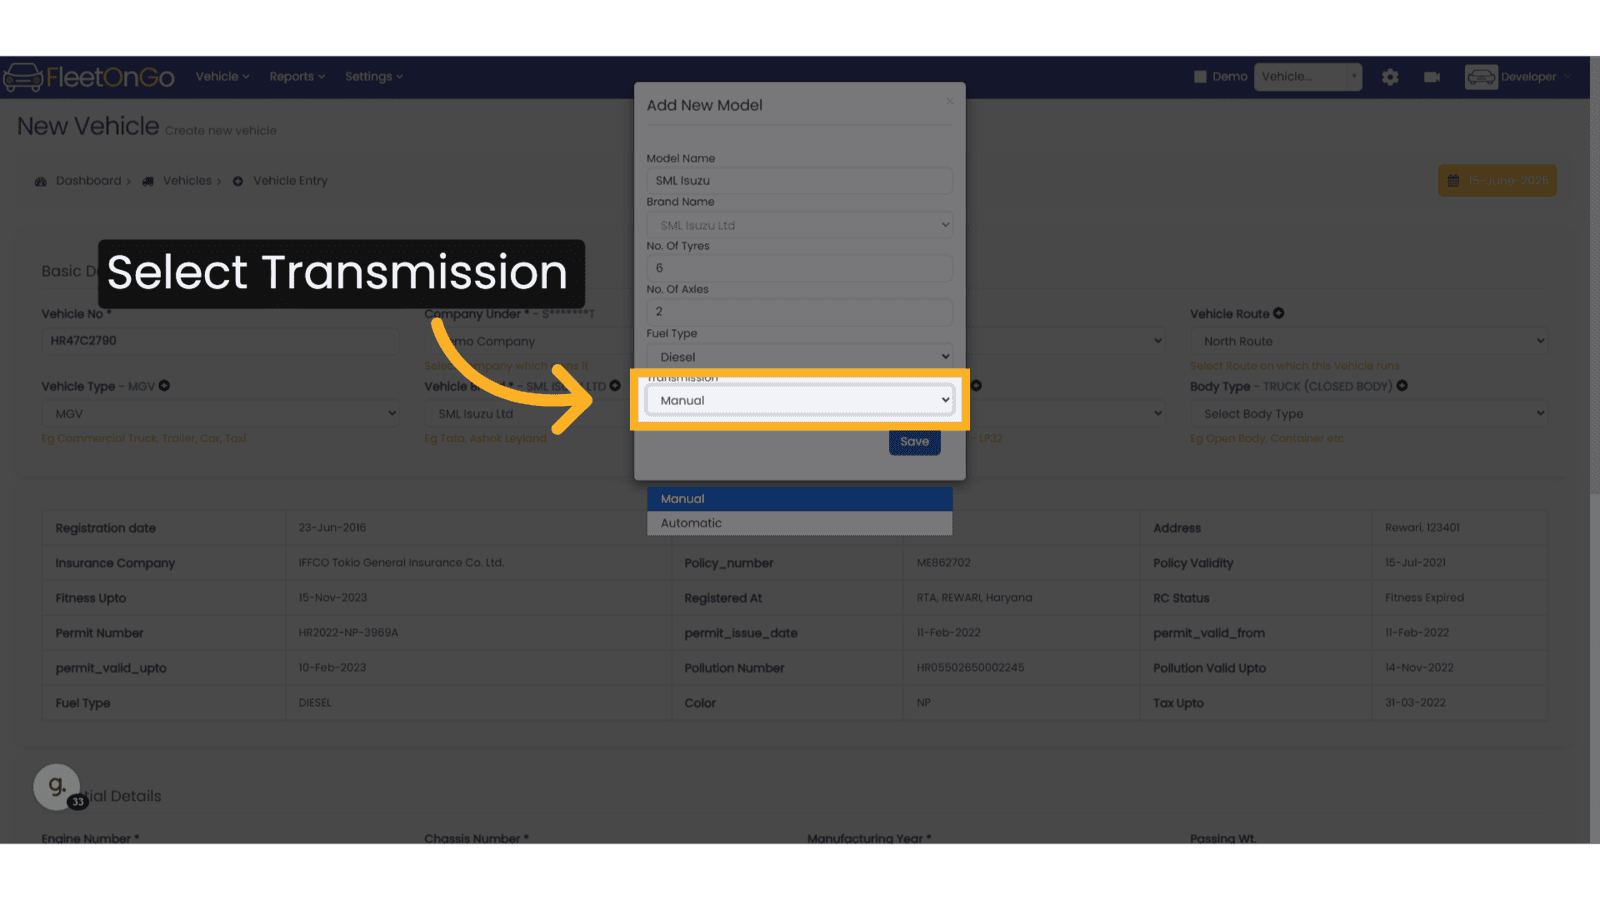
25. Select Transmission
Select Transmission from the list.
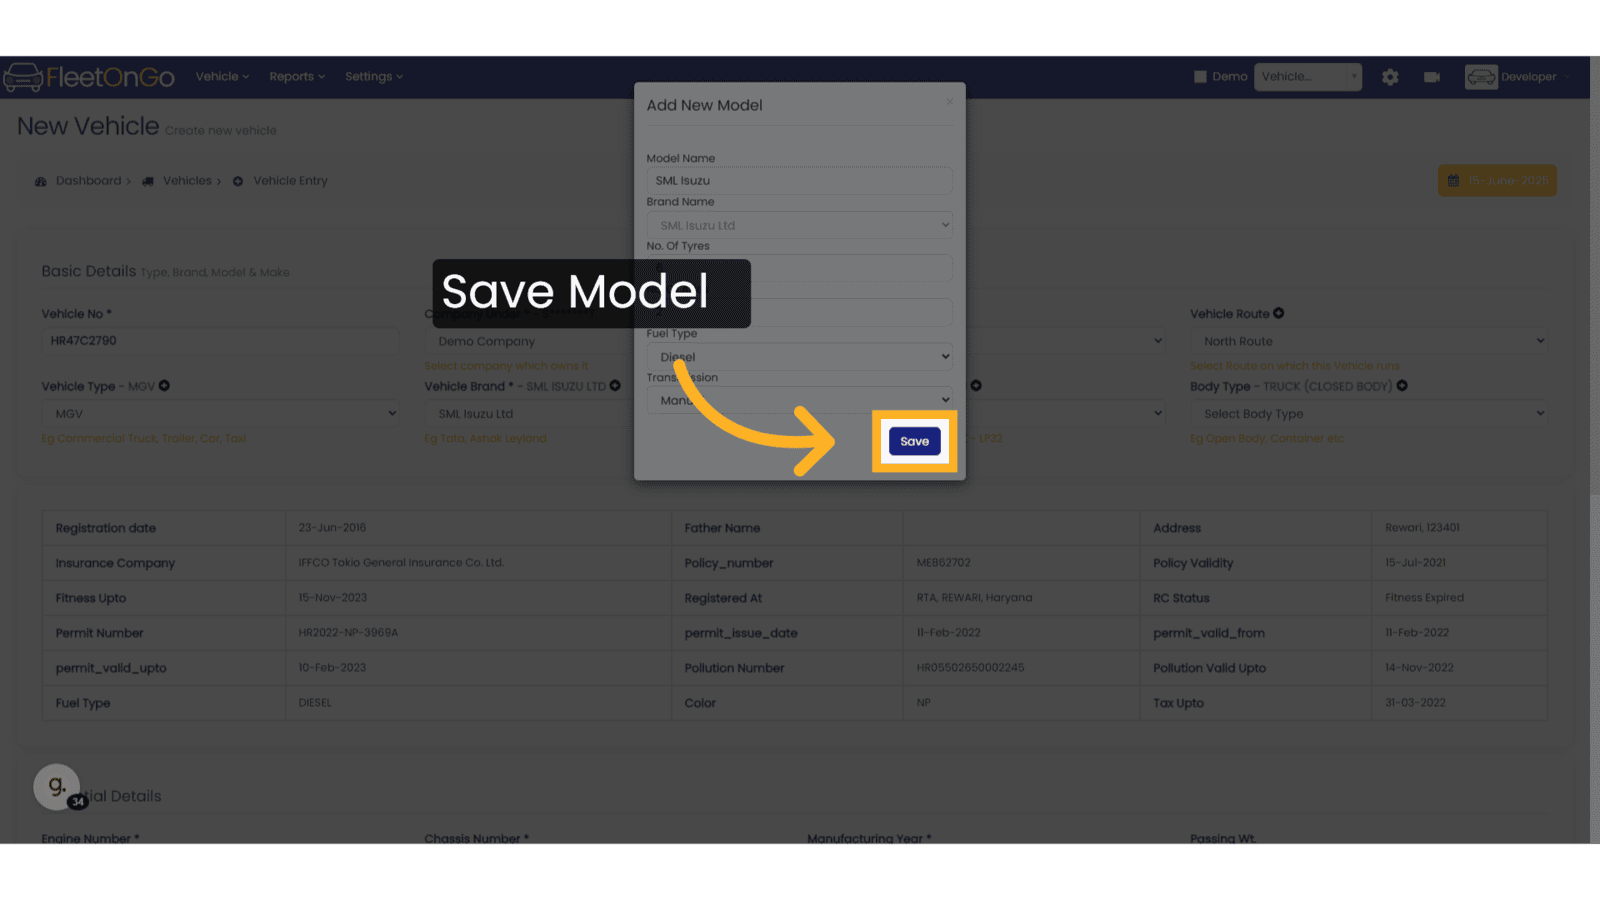
26. Save the Model
Click to Save the Model.
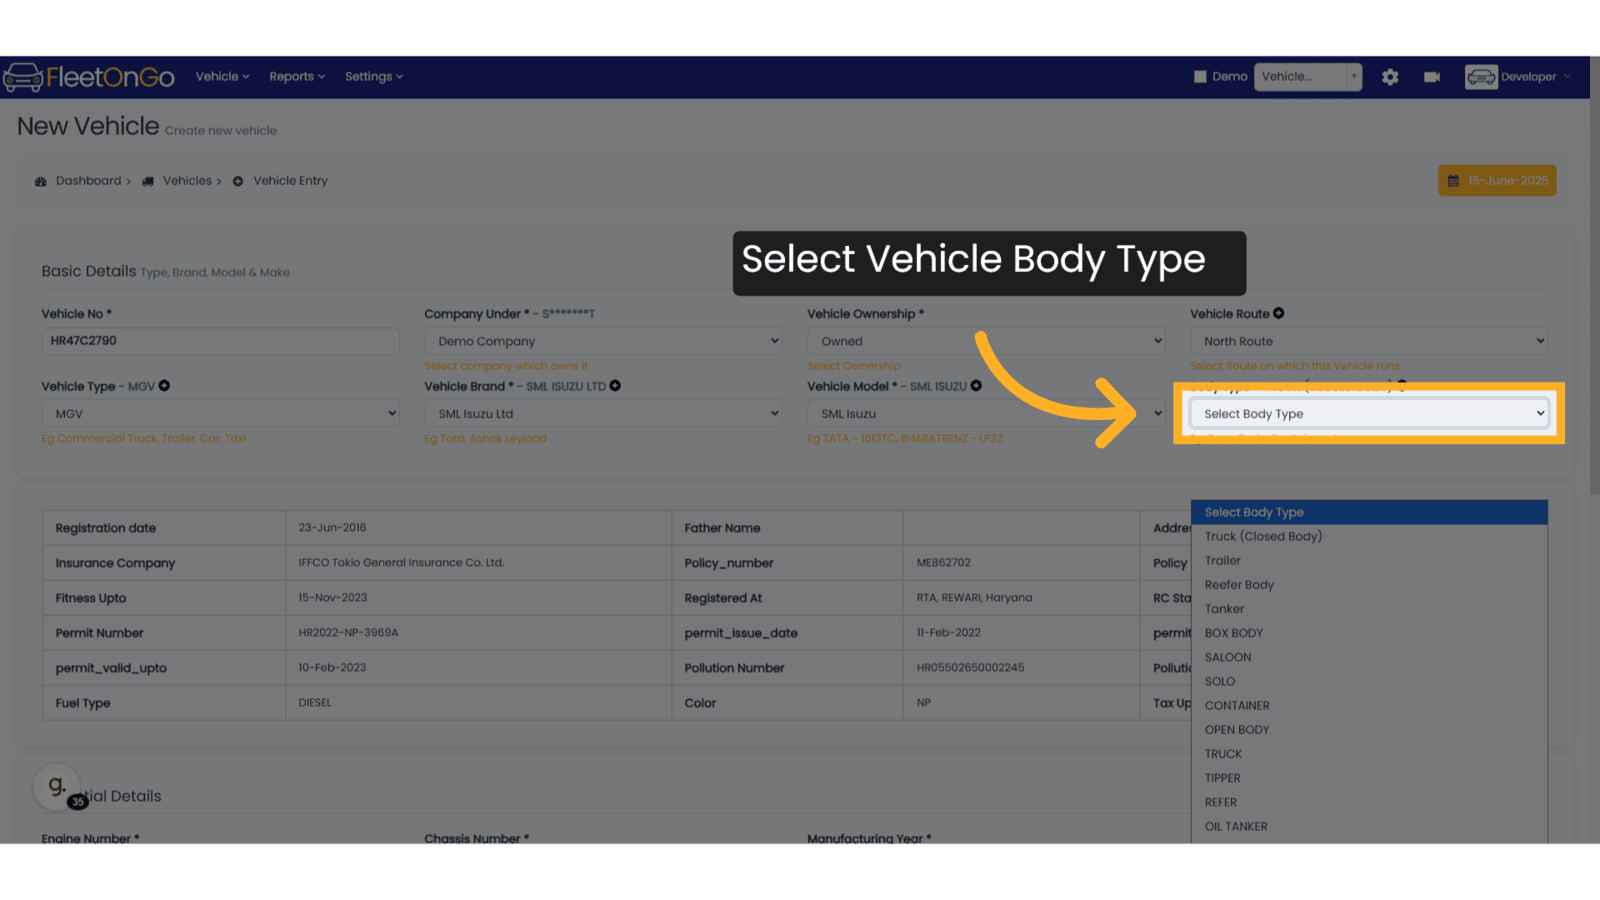
27. Select Vehicle Body Type
Select the Vehicle body type from the list. Example. Truck Closed, Truck Open, Saloon, Hatchback, etc.
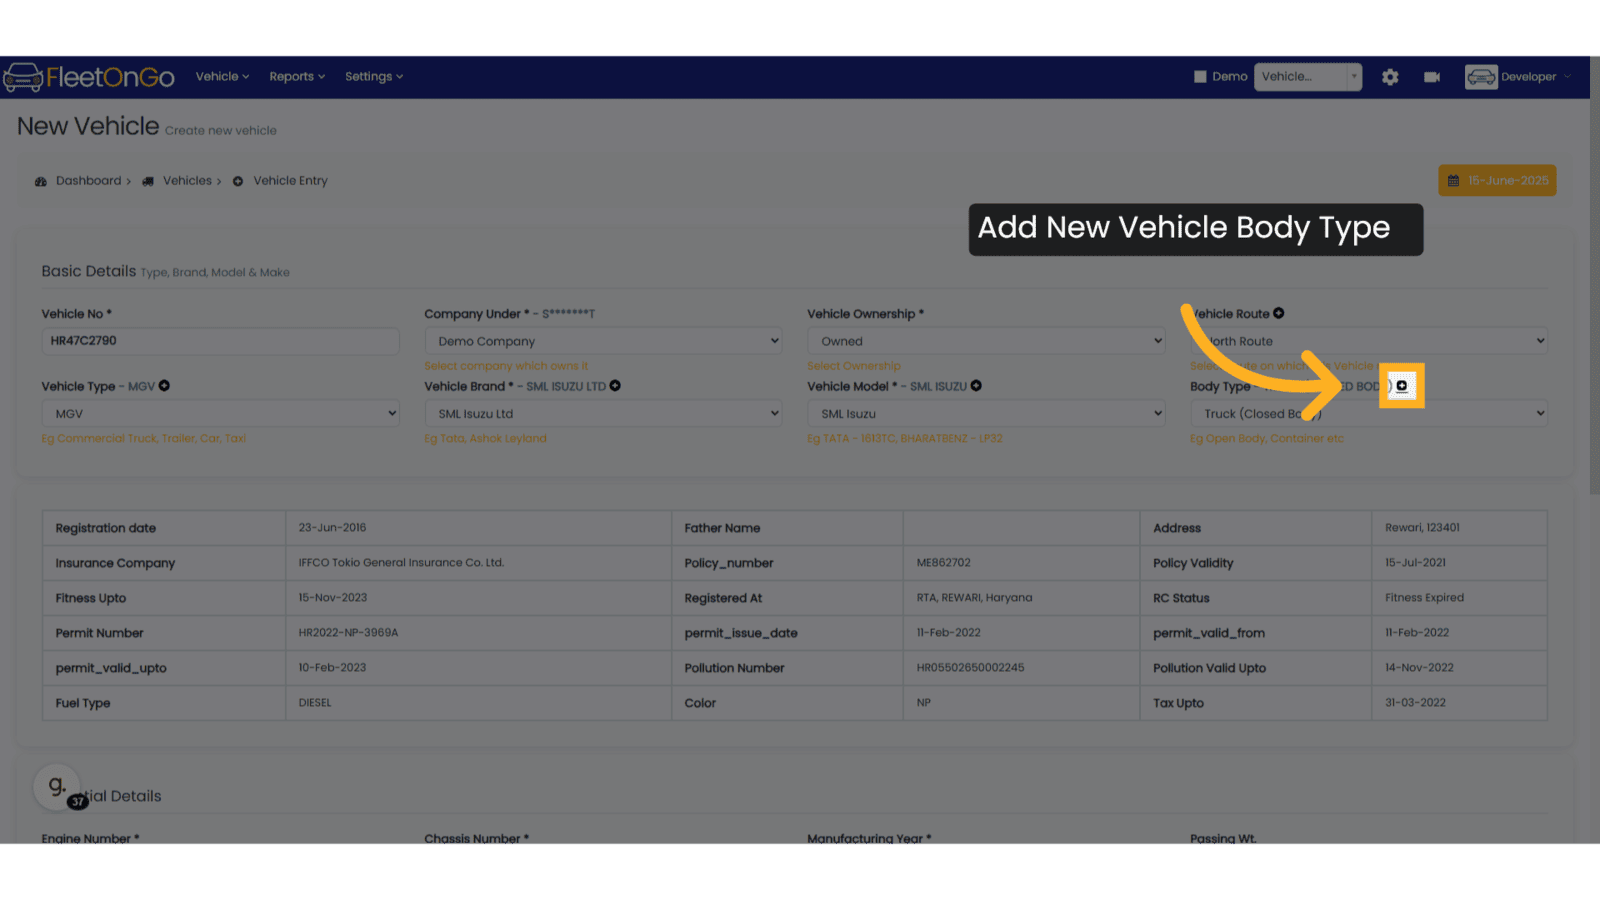
28. Add New Vehicle Body Type
Click the plus button to add new vehicle body types.
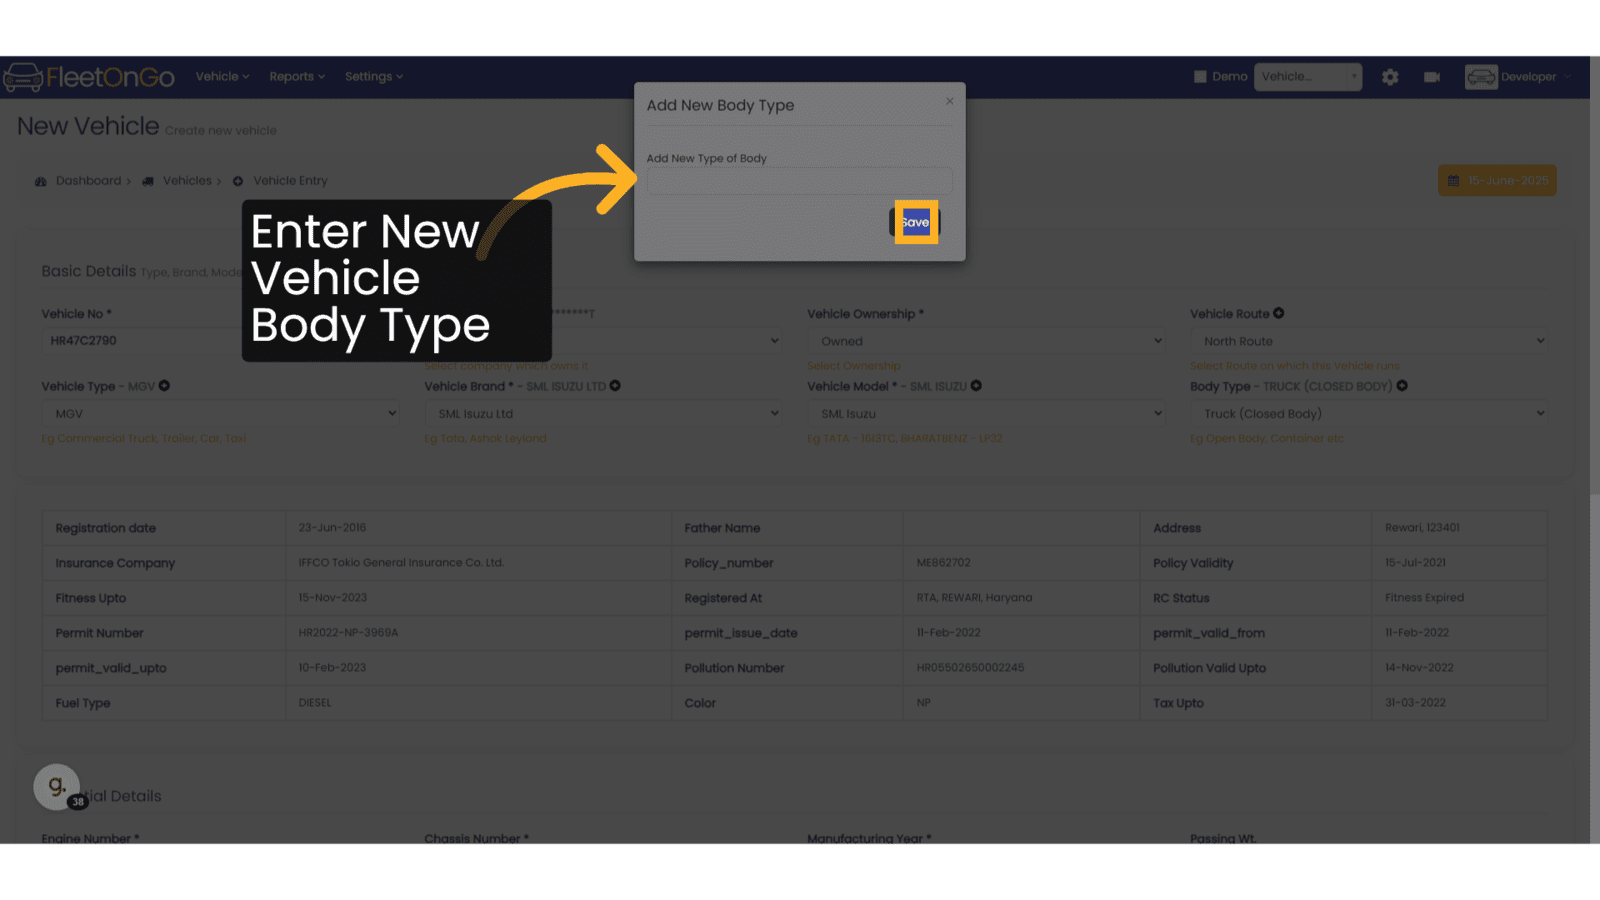
29. Enter New Body Type
Enter New Body Type in the popup and click on save.
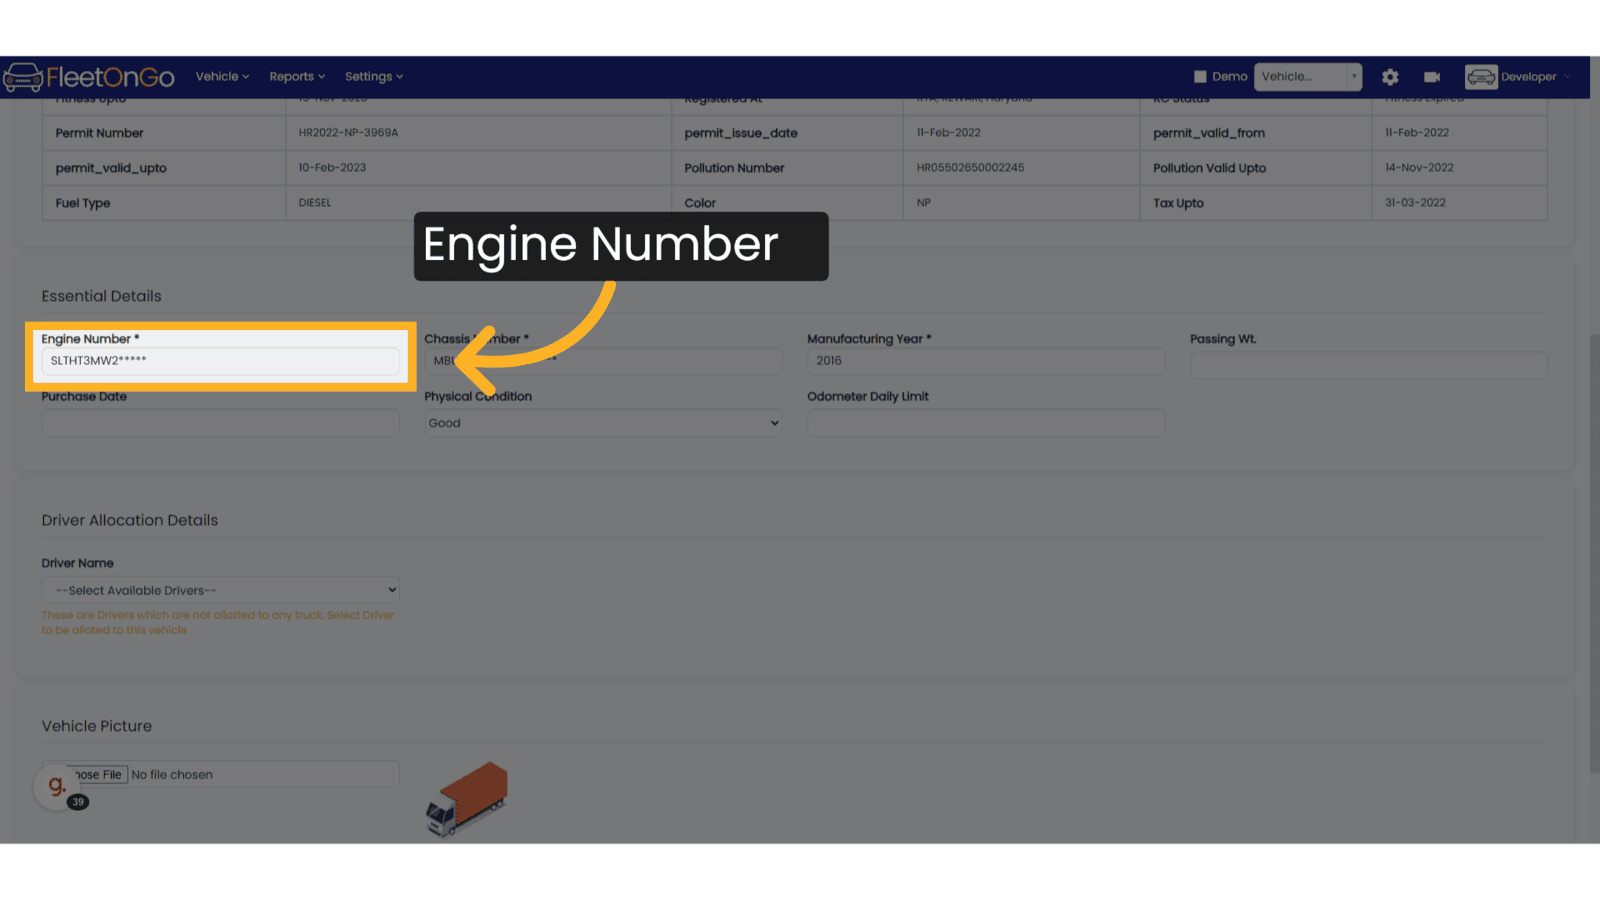
30. Enter the Engine Number
Enter the Engine Number of the Vehicle
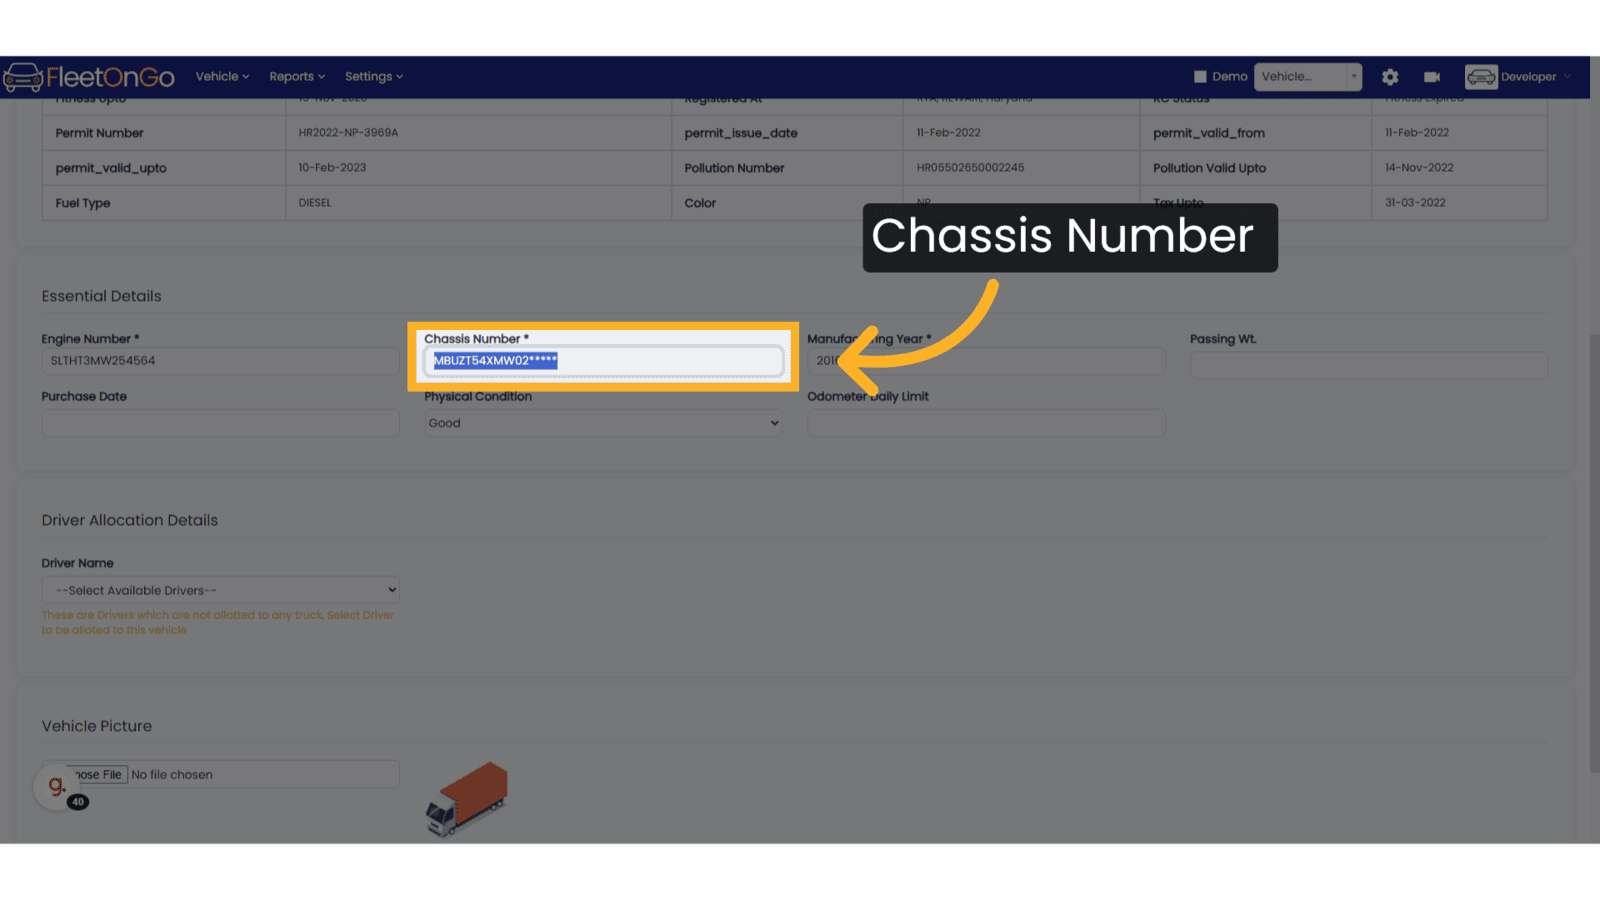
31. Enter the Chassis Number
Enter the Chassis Number of the vehicle
32. Enter the Manufacturing Year
Enter the Year of Manufacturing of the vehicle

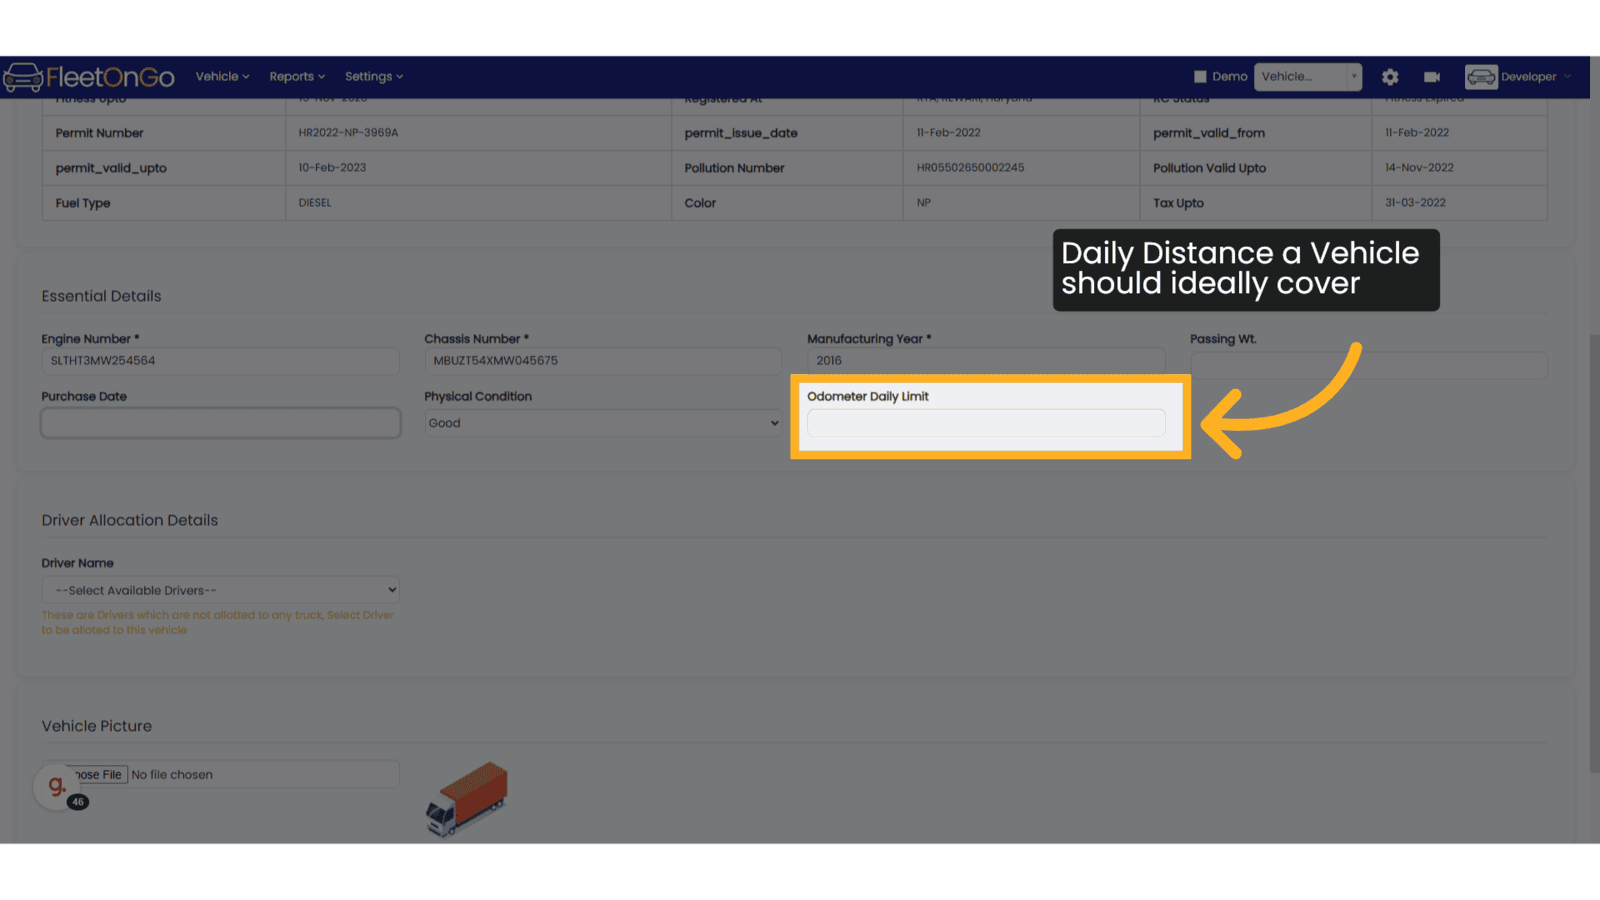
33. Enter Odometer Daily Limit
Add Daily distance which a vehicles should ideally cover.
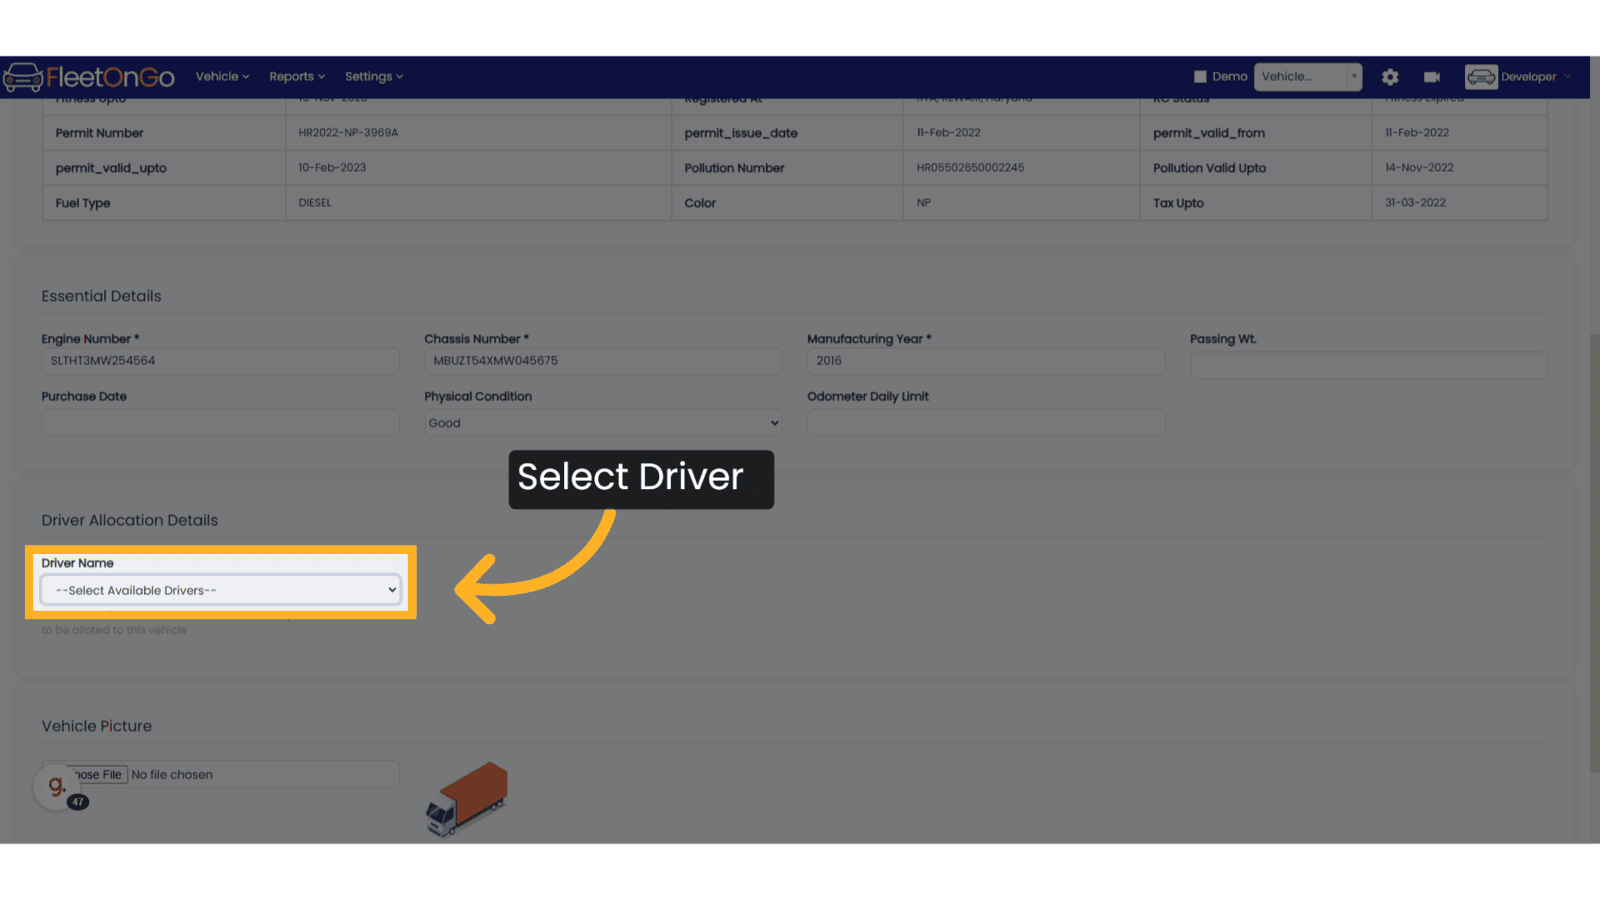
34. Select Existing Driver
Driver which are not assigned to vehicles will show in the list, you can select the driver to be connected to this vehicle.
35. Driver Past Records
Once you select a driver, FleetOnGo will show which was the last vehicle driver has driven, and when were they de allocated from the last vehicles.

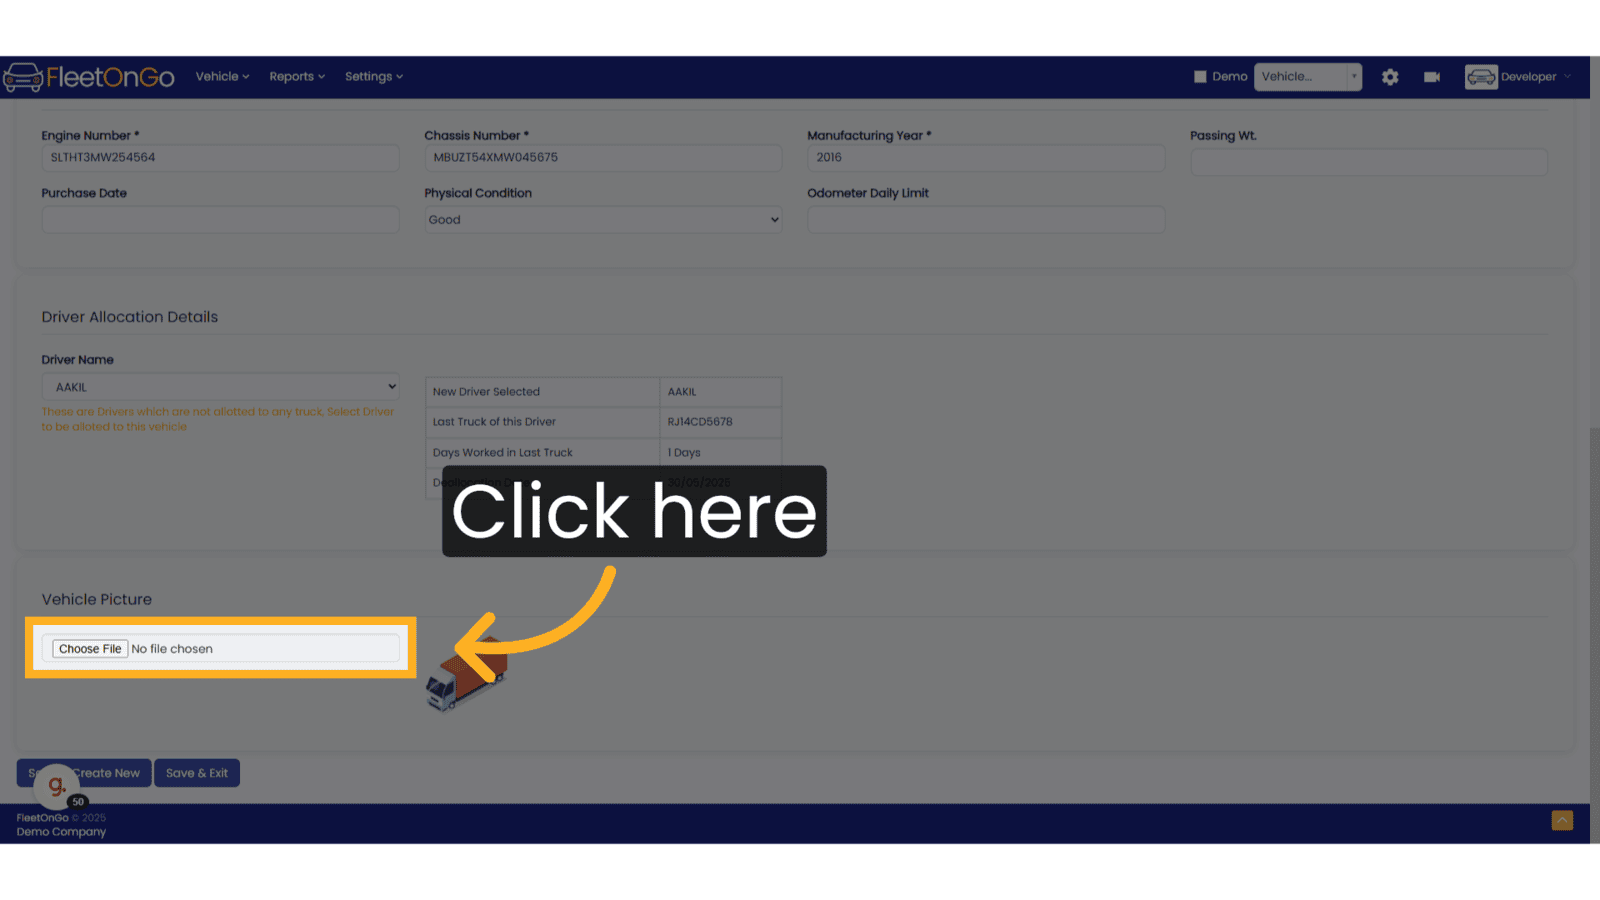
36. Add Image of Vehicle
Click to Upload an image of the vehicle
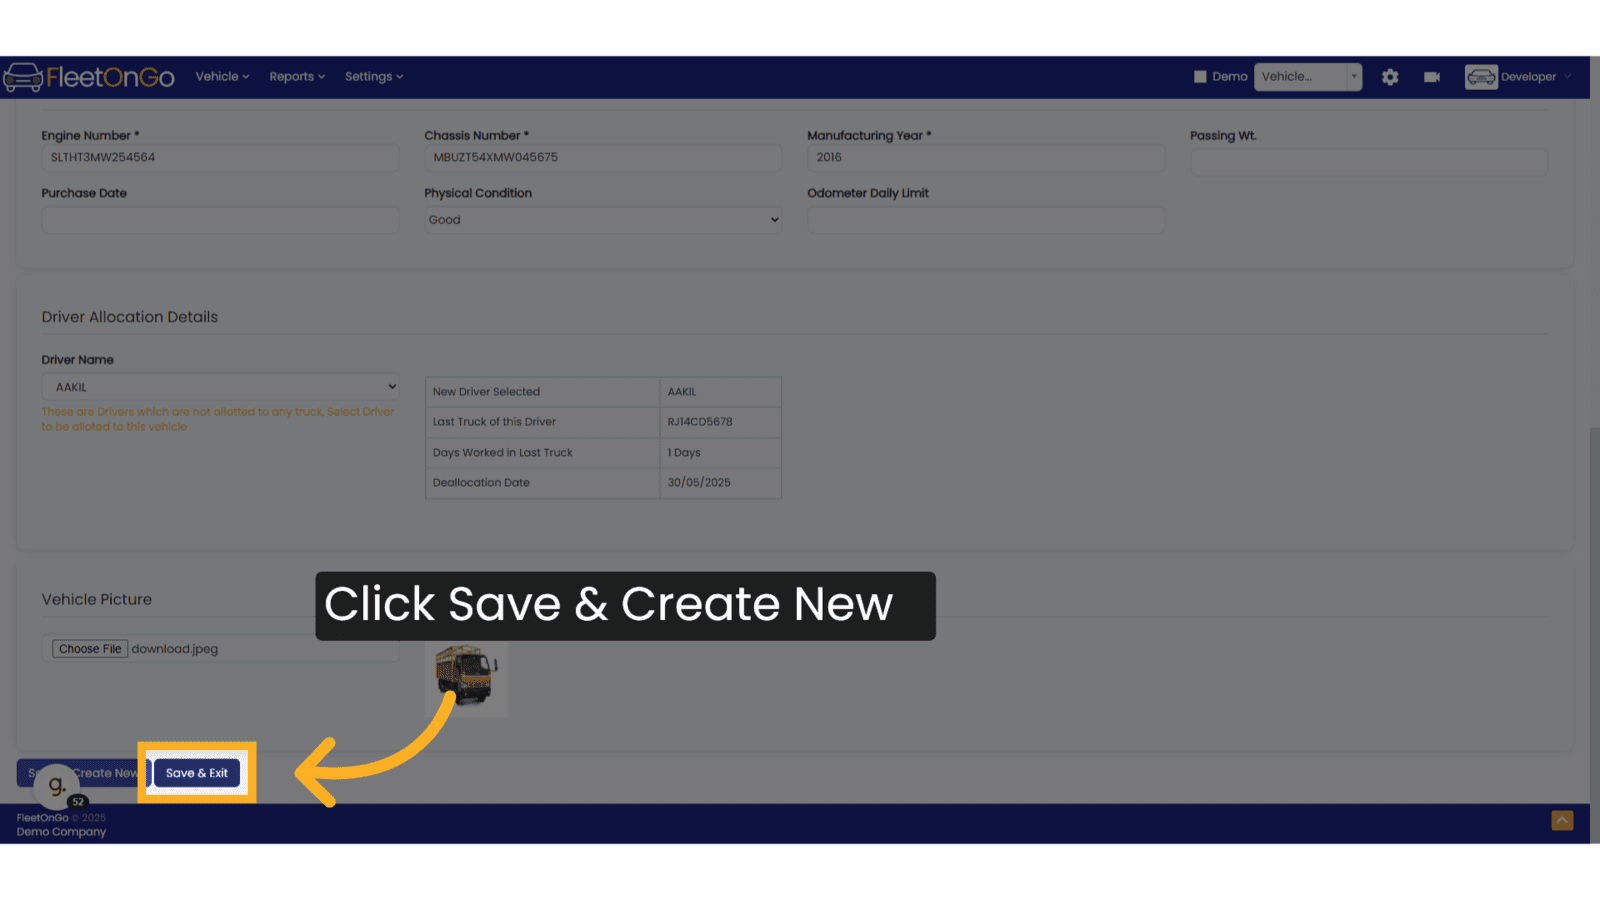
37. Click Save & Create New
Click on save & create new when you want to save the existing vehicle and you want to add more vehicles.
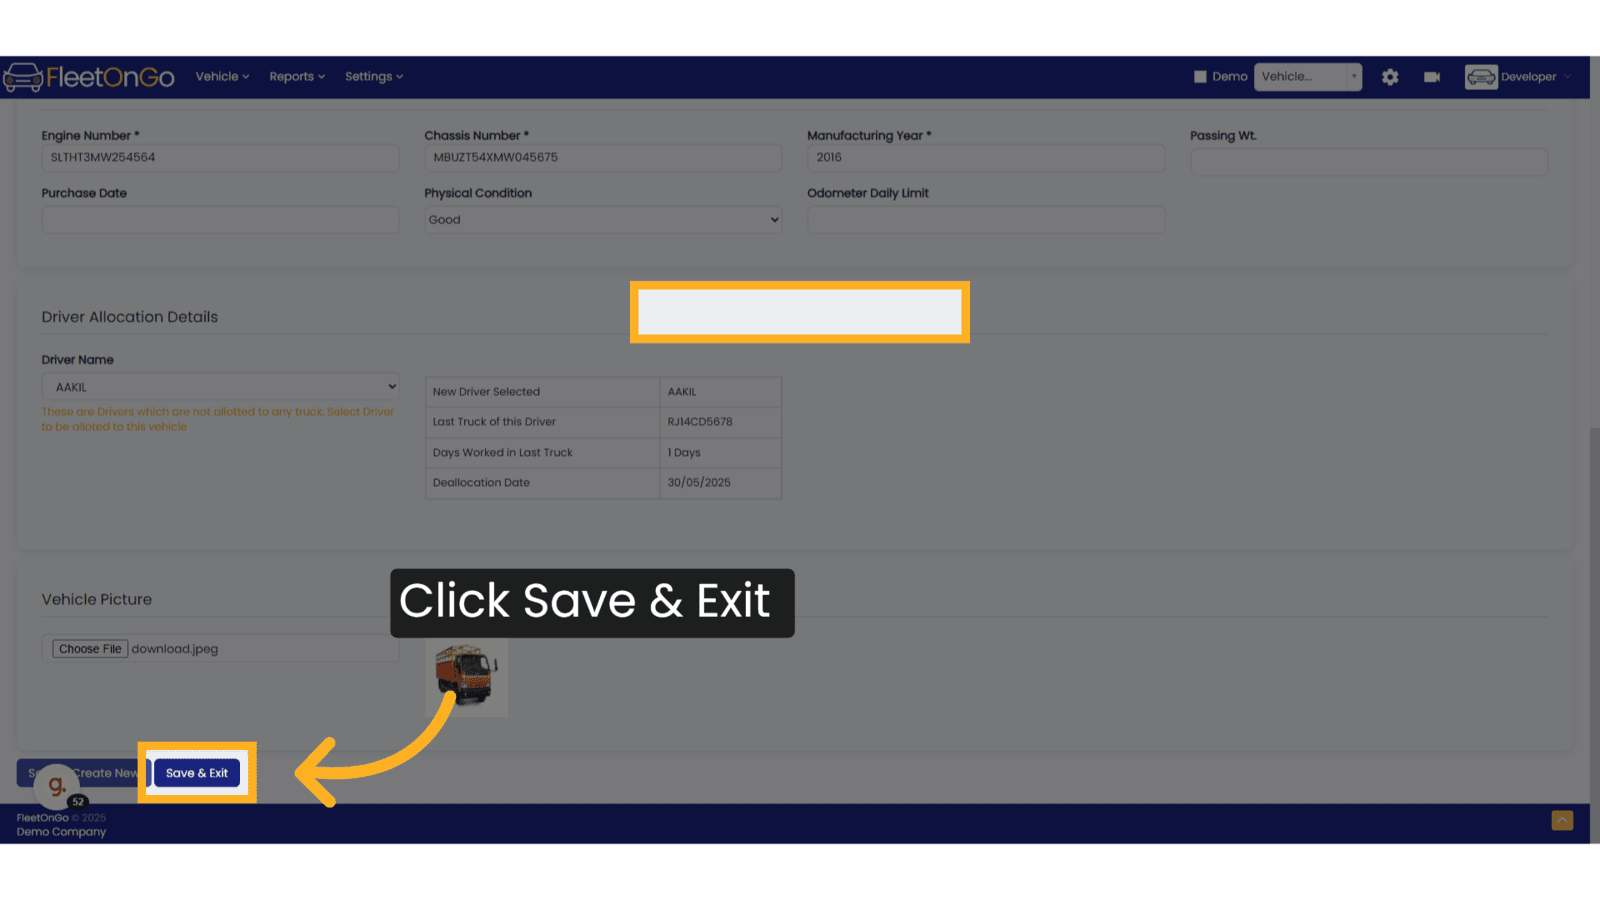
38. Click Save & Exit
Click on save & create new when you want to save the existing vehicle and you do not want to add more vehicles.
39. New Driver Added in the List
Now the New Vehicles which we saved is visible in the list of all vehicles.

The guide covered the detailed process of adding new vehicles in Fleetongo, encompassing steps such as selecting vehicle types, brands, models, ownership details, fuel types, and more. Following these instructions will enable users to effectively manage vehicle information within the application.
Related Articles
Existing Vehicles Models
Existing Vehicles Models Introducing the "Existing Vehicle Models" feature, designed for fleet manager in FleetOnGO. Go to app.fleetongo.com 1. Click "Vehicle Models" Click on settings and go to Vehicle master and navigate to Vehicle Models. 2. Click ...Archived Vehicles
Archived Vehicles Introducing the "Check Archived Vehicles" feature in Fleetongo, designed for fleet managers seeking to optimize their vehicle utilization Go to app.fleetongo.com 1. Click Vehilces Go to the 'Vehicles' section, then select 'Home'. ...Add New User
User Management Introducing the User management in fleetonGo. Go to app.fleetongo.com 1. Click "settings" Access the settings section to manage user accounts. 2. Click "Add New User" Initiate the New user creation process. 3. Fill Basic Details Enter ...Vehicles & Drivers Allocations
Allot-DeAllot Introducing the Allot-DeAllot feature in Fleetongo Go to app.fleetongo.com 1. Click "Allot-DeAllot" Select the Allot-DeAllot option to manage your fleet effectively, ensuring optimal resource allocation. 2. Click "Allot Vehicle" Begin ...Issues in Vehicles
Issues in Vehicles Introducing the "Issues in Vehicles" feature in Fleetongo! Go to app.fleetongo.com 1. Click "Issues in Vehicle" Click on 'Vehicle', go to 'Home', and then navigate to 'Issues in Vehicles. 2. Click "New Issue" Click on 'New Issue' ...